On our Astronomical Society chat group I was asked for my thoughts on the Move Shoot Move Star Tracker system. This system is made up of a bunch of components with differing purposes, but all centred around a star tracker called a Nomad. At its heart, the Nomad is an axle that rotates at 15° per hour. Once you have set a few components up correctly, you can mount a camera and lens on top, and it will track the sky. That way, you can get nice long exposures showing detail and contrast that your camera wouldn’t be capable of getting in short exposures.
The Nomad itself
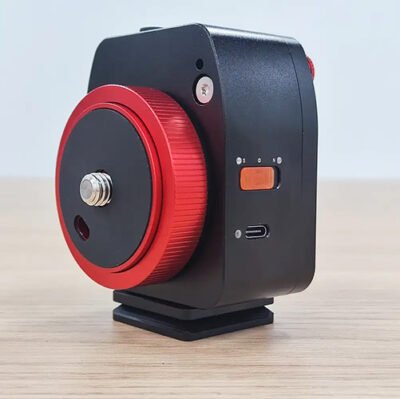
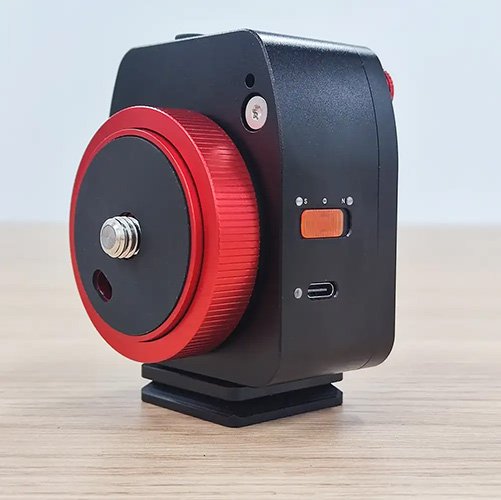
The Nomad is just one component of the Move-Shoot-Move tracking system. You can’t really just use the Nomad on its own. I think the marketing people at MSM have separated the components out so they can say it’s really cheap (“prices start from…”). The square feature at the bottom is an Arca-Swiss plate that can clip onto many tripod heads, wedges and similar clamps. It’s a bit of an industry standard in photography.
The red dial at the front of the Nomad is the part that rotates slowly. It has a 3/8″ thread sticking out the front, and you attach the next component to that. The direction it rotates depends on whether you’re in the Southern or Northern Hemisphere.
Carrying capacity
Star trackers are rated by the weight of equipment they can carry while still rotating accurately. The payload for the Nomad is reasonably small, at 3.5kg, and achieving even that will be difficult without very careful balancing. However, the Nomad works very well for a small-sensor camera paired with a small wide-angle lens (say a 15mm f/2).
If you have heavy gear like a full-frame camera with a large (either bright or long) lens, you are going to need a beefier tracker like a Sky-Watcher Star Adventurer 2i or an iOptron HST. Much larger equipment, like a 500mm lens and you really ought to get a small equatorial mount like a Star Adventurer GTi, saxon HEQ5 or iOptron CEM26.
Polar alignment
The secret to getting a good image is that your equipment needs to be aligned to the pole. That is, you have to point the face of the Nomad (the one with the 3/8″ screw) exactly at the South Celestial Pole (or the North Celestial Pole if that’s where you are). The accuracy of your polar alignment will determine how long you can expose for without getting egg-shaped stars. This is always a challenge in the southern hemisphere.
There are a couple of ways to go about polar alignment, and different methods need different components, as follows.
Phone connector
MSM’s normal solution for polar aligning is to get a phone connector and use a phone app like Sky Safari or Stellarium. These apps can show you what the phone is pointed at. The photo below shows a couple of different types of phone connector. The difference between the two is how you attach it: to the polar scope, or direct to the back of the Nomad.
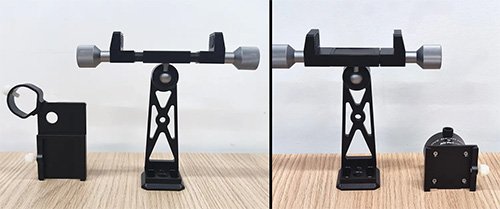
This approach mostly works for the shortest lenses because it’s not very accurate. It relies on your phone’s understanding of where it is and what angle it’s on, and your phone can be foxed by nearby cars, bad calibration of your phone’s accelerometers, etc.
Polar scope
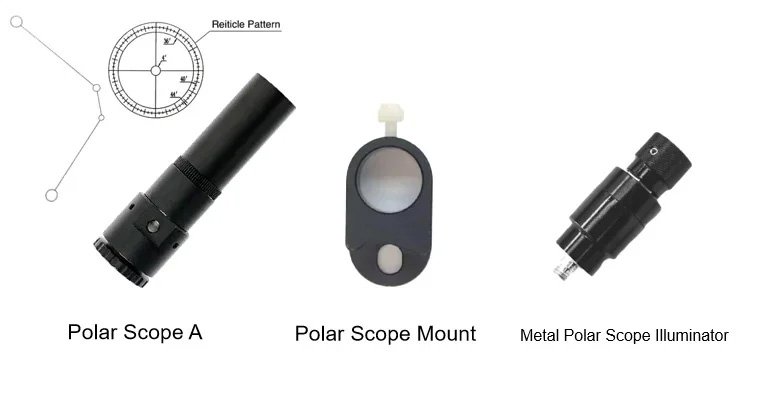
The alternative approach to polar aligning is the polar scope. This can get you very accurate results, but in order for you to see the dim stars you need to see, you have to have the scope pointed pretty accurately already. To achieve this, you need a pair of binoculars and some practice.
If you look through the polar scope you can see not only the stars, but also a pattern of circles. Your task is to rotate the polar scope and adjust the angle of the Nomad so that Sigma Octantis and three other stars sit nicely in the circles. (In the Southern Hemisphere you ignore the clock-like pattern.)
Incidentally, there are two version of the polar scope out: a side-lit one and a front-lit one. The side-lit one is more expensive due to the separate LED illuminator that hang off the side. However, unless you’re at a good dark sky site, this is the one you really want. The front-lit polar scope is fine for when the Northern Hemisphere with its bright Pole Star. However, the Southern Hemisphere stars are very dim, and the front light is enough to wash them out.
Laser
Be aware that MSM’s preferred (and heavily advertised) polar alignment method is a laser pointer and this is prohibited (or at least restricted to license holders) in Australia. It’s also prohibited in many other countries. If you buy one direct from the MSM website, customs are very likely to intercept it before you get it.
Wedge
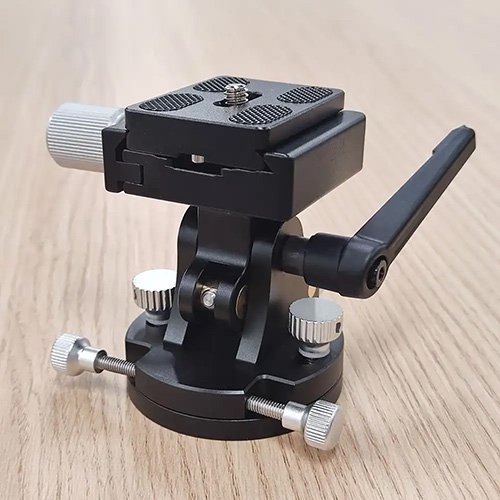
To polar align, you need to physically tilt the Nomad back to match your latitude. Getting this done to an acceptable accuracy is a fiddly job, and despite what MSM suggest, you can’t do it with a ball-head, and it’s nearly as impossible with a fluid head. You need a gadget called a wedge between your tripod and the Nomad. You adjust the altitude (up-down) and azimuth (left-right) by winding knobs on the wedge rather than grabbing the Nomad and cranking it around. When it’s in the right position you lock it down and leave it for the rest of the night. You can still move the camera to find your target (using the ball-head – see below), but the wedge and the Nomad don’t move.
Ball head
The one component you will most likely need (although many photographers already have one) is a ball head. (Remember I said you can’t use a ball-head for polar alignment – confusingly, this is a different one!) You can use this gadget to point your camera in any direction, despite the Nomad being locked in place. If you put the ball head on top of the Nomad (and then put your camera on top of the ball head), you can point to any target you want, and the polar aligned Nomad will keep tracking accurately.
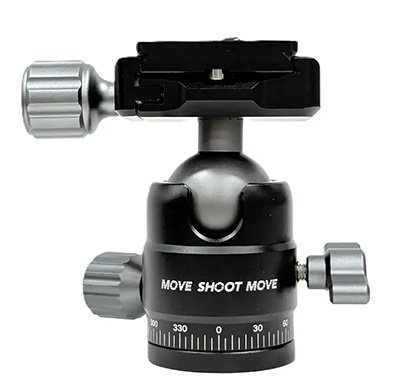
There are a few versions of the ball-head available, including generic ones. The weight of your gear will determine which one you need. The important part is that it needs to have a 3/8″ female thread at the bottom to match the Nomad. It will have a 1/4″ thread at the top (probably on a quick release plate) to match your camera.
Extra components
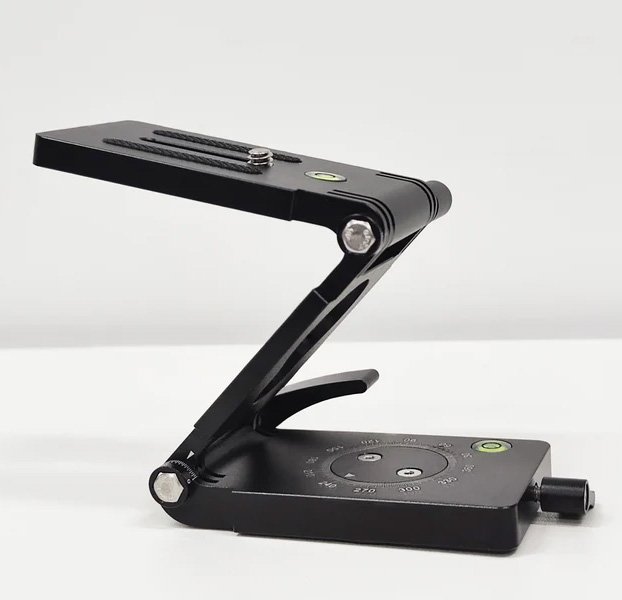
Finally, MSM make a heap of different attachments like pan bases, Z- and V-mounts etc. These are beautifully made, work very smoothly, and can make your job a little easier. However, for a beginner getting your first image they’re not really required. They’re included in some lot of the kits available, but more often than not they’ll end up living in your bag and never seeing the light of night. This one is a Z-mount, and it’s useful when shooting panoramas with a horizon, but it’s not the sort of thing you need right away.
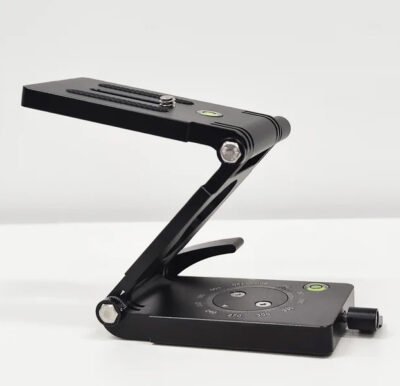
Because there are so many variations of components, it’s very possible to have too many. For example, there’s a version of a ball-head that has panning rotators below the ball-head as well as at the saddle. If you have this type of ball-head, you certainly won’t need separate panning bases.
Our recommended kit
In general, you can buy Move Shoot Move components separately, but there are a few kits as well. There’s not much discount for kits compared to individual components, so buy just what you need and save some money.
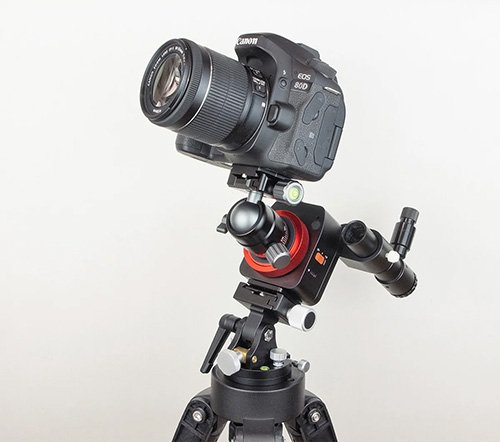
We put our heads together and came up with a combination of parts that we think are the most appropriate. It’s not the cheapest kit because it comes with the side-lit polar scope. However, this kit alone is all you’ll need to get a beautiful image with long exposure times, even with longer lenses. You’ll just need some practice finding Sigma Octantis with your binoculars.
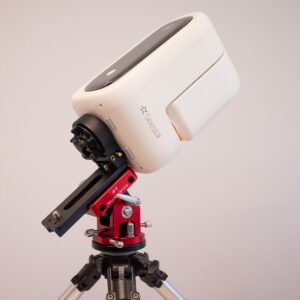
You can see in the photo that it starts with a bog-standard tripod with a 3/8″ bolt. Next you see the wedge, locked to the right position. The Nomad attaches to this with the Arca-Swiss clamp. ON the back of the Nomad is the mounting bracket for the polar scope, and the polar scope itself with its side illuminator. The ball-head is on the front of the Nomad, and finally, the camera is attached to that.
A maybe-not-essential component
If you wanted to cover all the bases, add a phone mount (the type that attaches to the polar scope). This would make polar alignment a two-step process. Start by using a phone app to get close enough to the Pole to see the stars through the polar scope. Finish by finessing the alignment with the polar scope. This would undoubtedly save you a lot of time hunting in the dark. However, this is a “nice to have” rather than an essential component.
Conclusion
If you’ve got a reasonably light camera and lens, the Move Shoot Move Star Tracking system is superb. It’s very well made and the parts fit together very nicely. Correctly aligned, the tracker will give you excellent deep-sky images. These images will have detail you’d never get with a camera and tripod, no matter how many images you stacked.
However, the system has weight capacity limitations. We should expect this because MSM aimed for they system to be the smallest tracker on the market. You won’t get good tracking results if you have a heavy camera and lens. It’s only worse if you try to use longer focal lengths. If you want to use rigs like these, my recommendation would be that you select a heavier tracking system.