Finderscopes and guidescopes
Finderscopes and guidescopes are fundamentally different. True, they’re both short refractors, but at some point, they diverge.
A finderscope is for visual work and shows you a large part of the sky. Using one, you can find your targets quickly. You bolt it to the side of your Dobsonian, and adjust it at the start of the evening. The idea is that whatever is in the centre of your main scope’s image is also in the centre of the finderscope’s image. To find a target, you swing the scope so it’s pointing roughly in the right direction, then put your eye to the finder. You should be able to see the target in the finderscope, as it has a large field. Next, move the main scope around so that the target is under the finderscope’s crosshair, and only then do you move to the main eyepiece.
On the other hand, a guide scope is for astrophotography, specifically for long autoguided images. Rather than having an eyepiece, the scope gets a guide camera, and the autoguide software uses that to monitor how your mount is guiding. Unlike a finderscope, it doesn’t need to be accurately pointing the same way as the main camera. The important thing is that it doesn’t move in relation to the main scope. Lock it down securely, so no matter what angle the scope is on, it won’t move.
Back focus
The main optical difference between guidescopes and finderscopes is their back focus requirements. This is the distance between the end of the focuser and the focal plane, where the image is actually formed.
Back focus requirement
How much back focus you need is determined by what equipment you need to fit in at the back of the scope. An eyepiece has to be put a little behind the focal plane, so the eyepiece older has to come out further than the focal plane, or there’s nothing for the eyepiece to hold on to. On the other hand, a camera has to be put so its sensor is right on the focal plane. This is where a scope becomes inflexible.
…and it gets even worse
To make things more complicated, there are different shapes of cameras. The older “puck” shape, which connects to the end of the focuser, needs the focal plane to be behind the end of the focuser. The 1.25″-barrel shape cameras have to be tucked down into the focuser, so they need the focal plane to be well inside.
For a finderscope, it’s different again if you’re using an eyepiece on its own, a mirror diagonal or a prism diagonal. Diagonals add quite a lot of optical length.
The possibilities are endless, and if you have tried to use a guide scope as a finderscope, or vice-versa, it’s easy to get frustrated. You end up either being defeated or having to get all sorts of extenders to make it work.
The solution
So, enter the ToupTek finderscope/guidescope range. The one we tested was the FS-250AR, which is a 30mm f/5 which is typical of both the FS and GS range.
These are switchable between a finderscope and a guidescope because the main tube has removable sections: the 250mm scope has a 50mm and 70mm section. This means you can add or remove sections, changing the back focus so the focal plane falls wherever your equipment needs it. You can see it in this photo – let’s call it “deconstructed”. The objective is the part with the white stripe, the focuser (in this case a rack and pinion) is on the left. The extension tubes are behind.
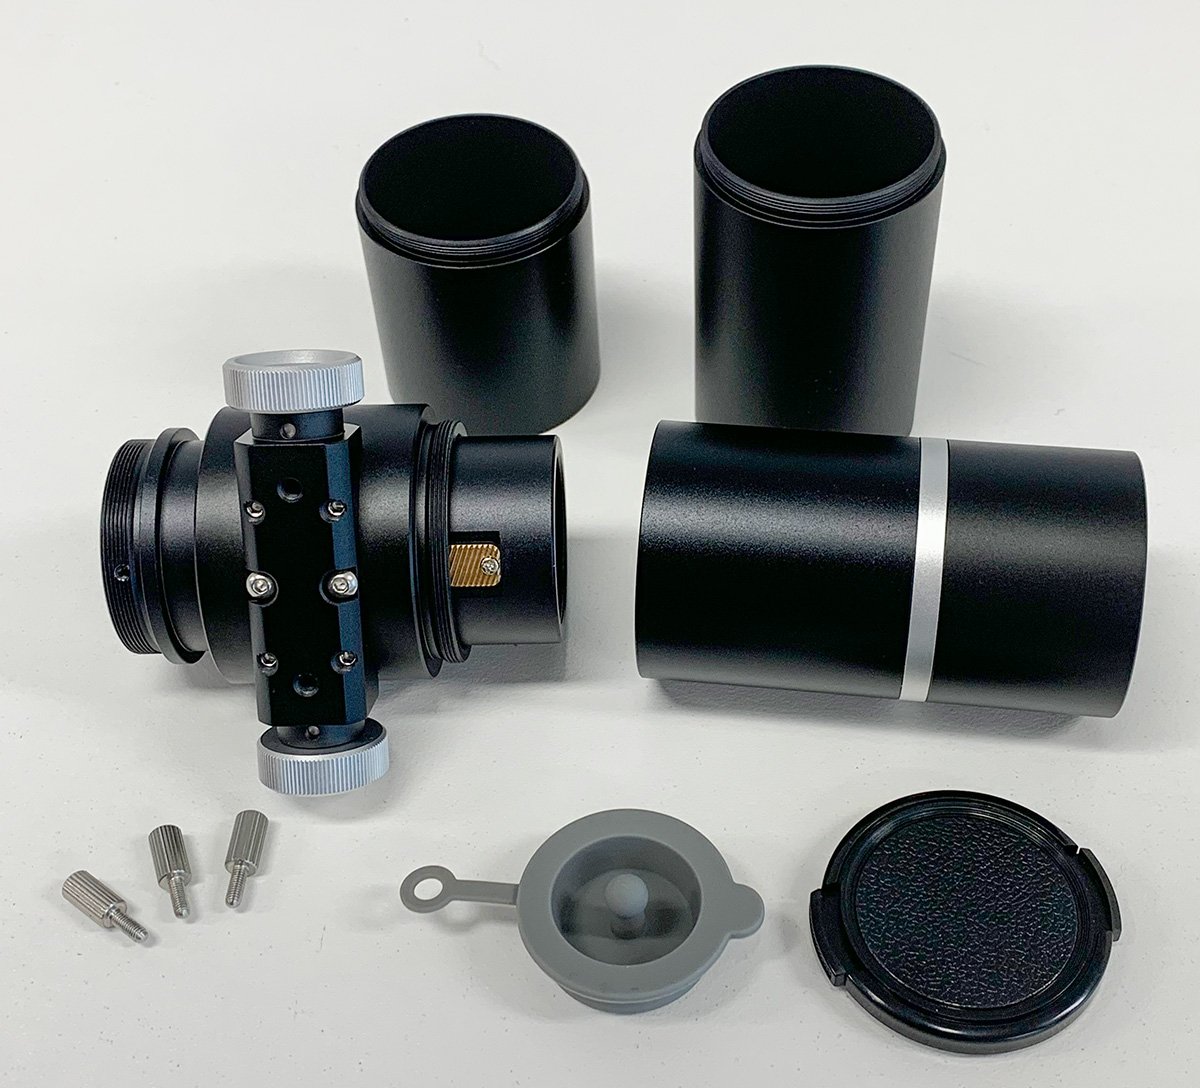
We spent a bit of quality time with our FS-250AR. Using the removable sections, we successfully focused on infinity in five different arrangements, as follows:
Finderscope with right-angle mirror diagonal
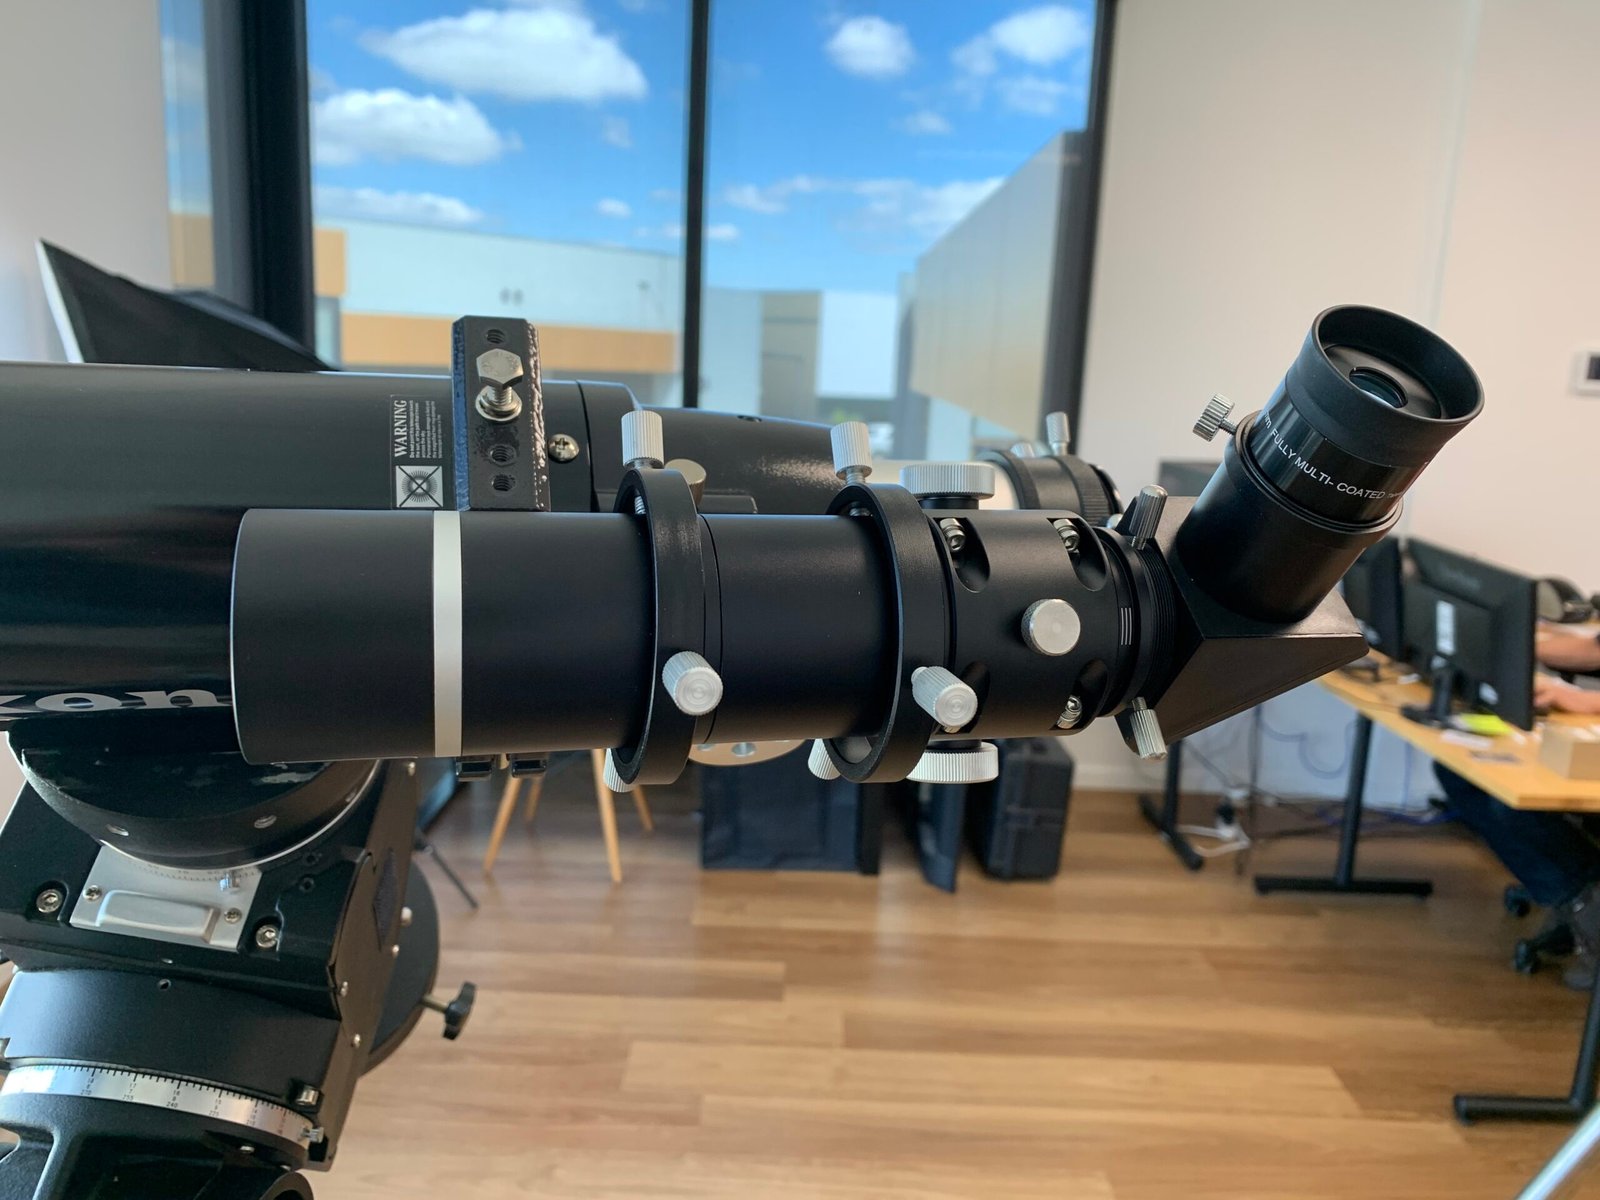
This situation needed us to shorten the tube by removing the 70mm extension tube, just leaving the 50mm tube in place. To fucus on infinity we had the focuser quite close to its minimum position.
Finderscope with 45° prism diagonal
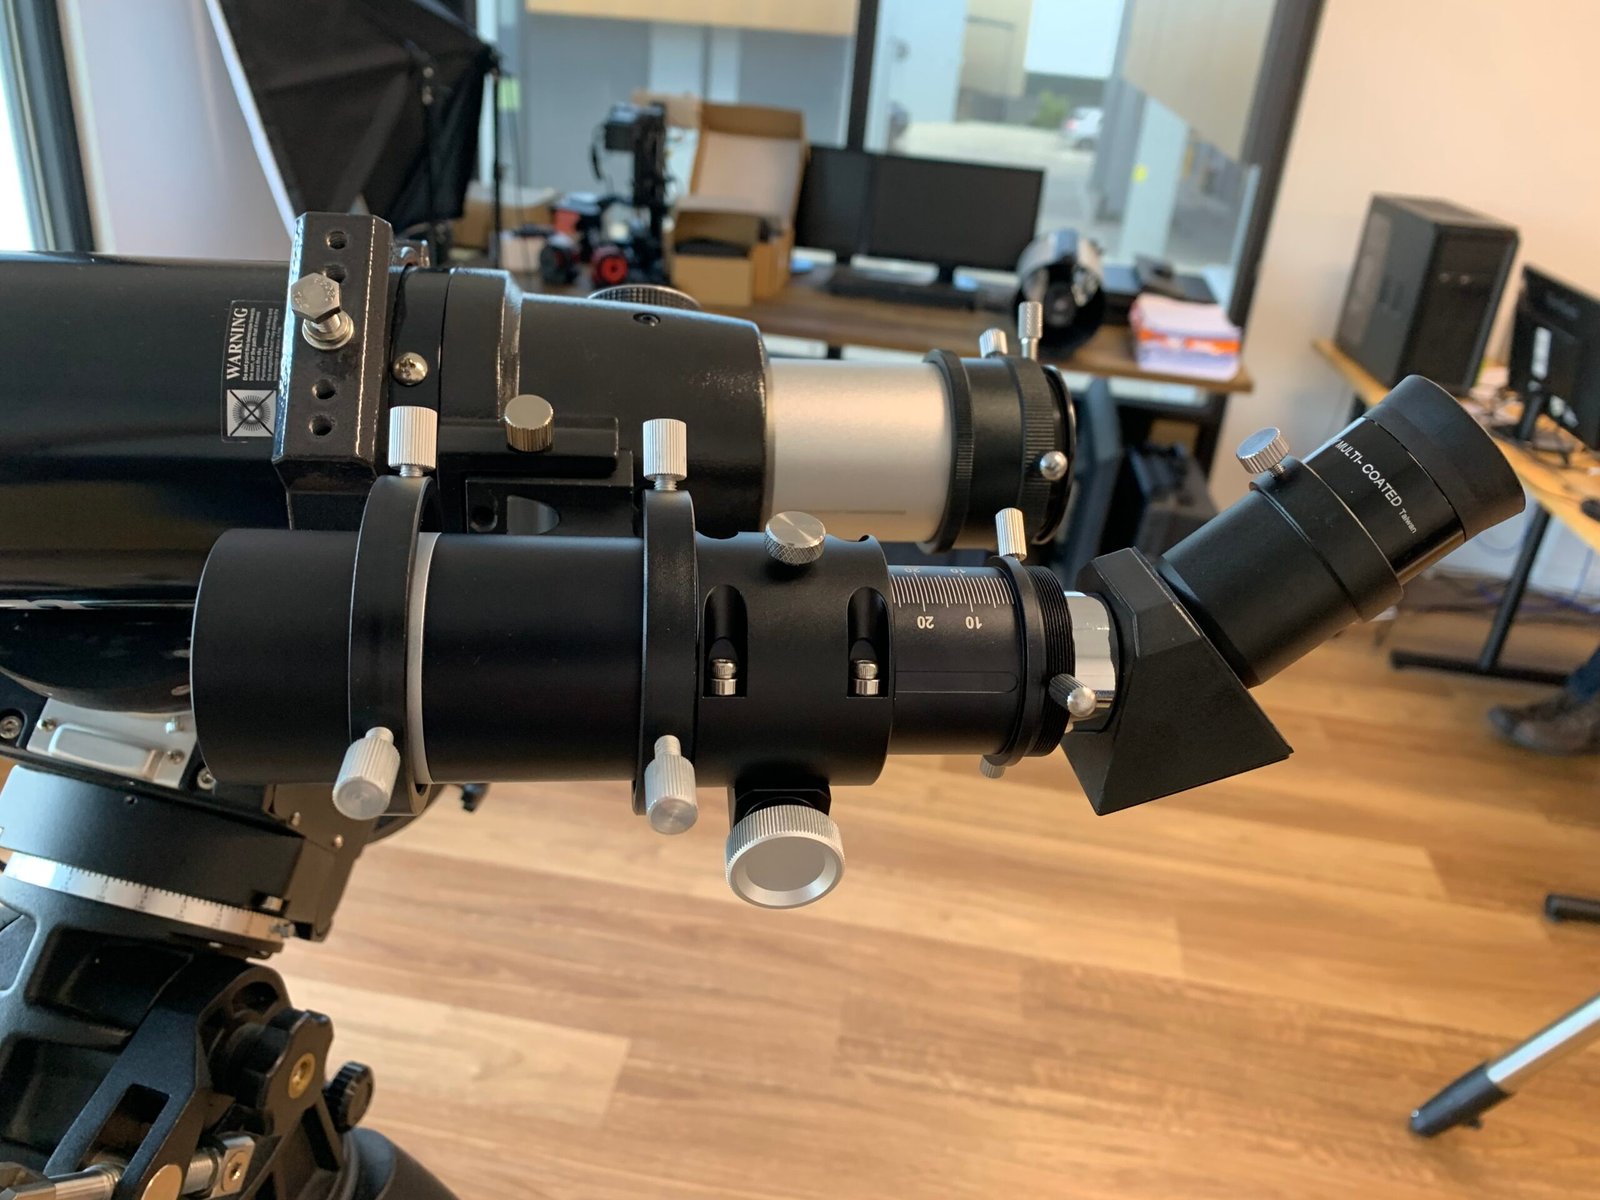
For the prism, which involves several reflections to get the image to be correct, we needed to remove both extension tubes. In this configuration we needed to rack the focuser all the way out and even had to draw the diagonal’s connector out of the focuser a few millimetres. The diagonal was still secure in the focuser.
Finderscope with straight-through eyepiece
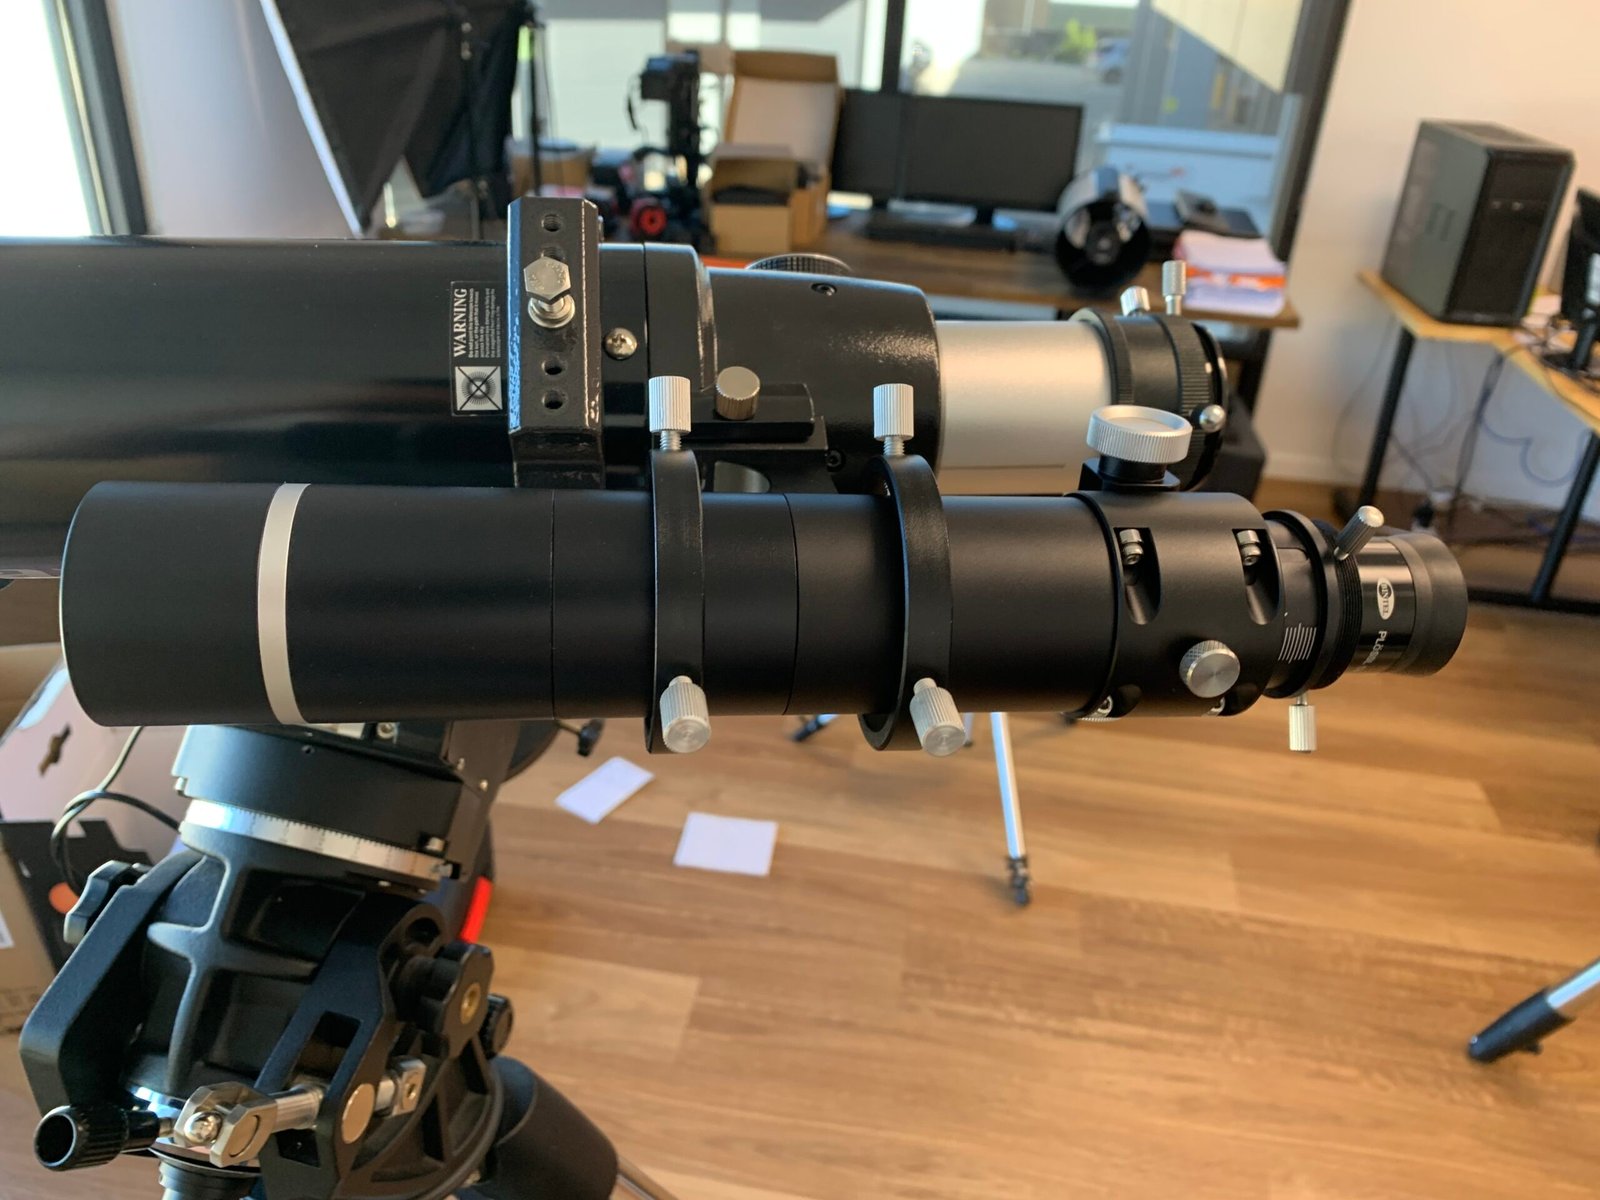
For this configuration, with no reflections in the optical path, the eyepiece had to be a long way from the objective lens. This meant that we needed both extension tubes in place. The focuser was comfortably in the middle of its range.
Guidescope with puck-shaped camera
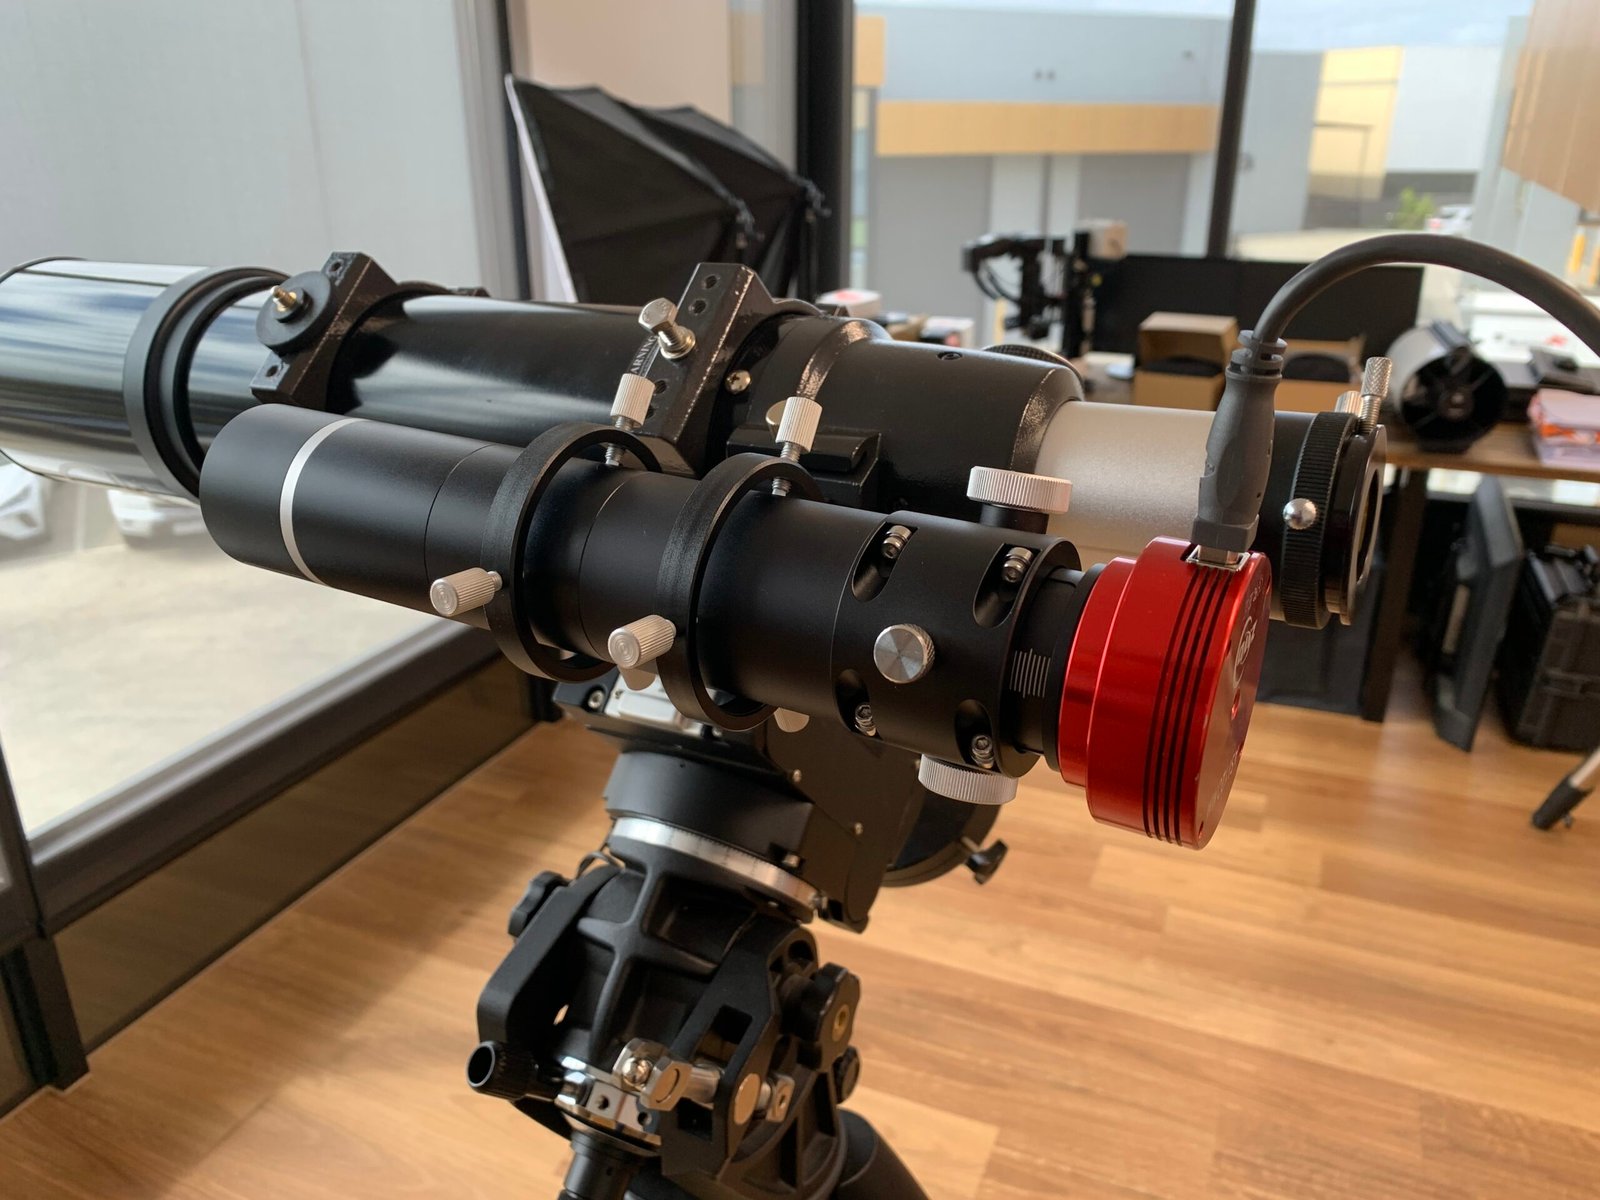
This configuration also needed both extension tubes, with the focus racked around 8mm out.
Guidescope with 1.25″ barrel camera
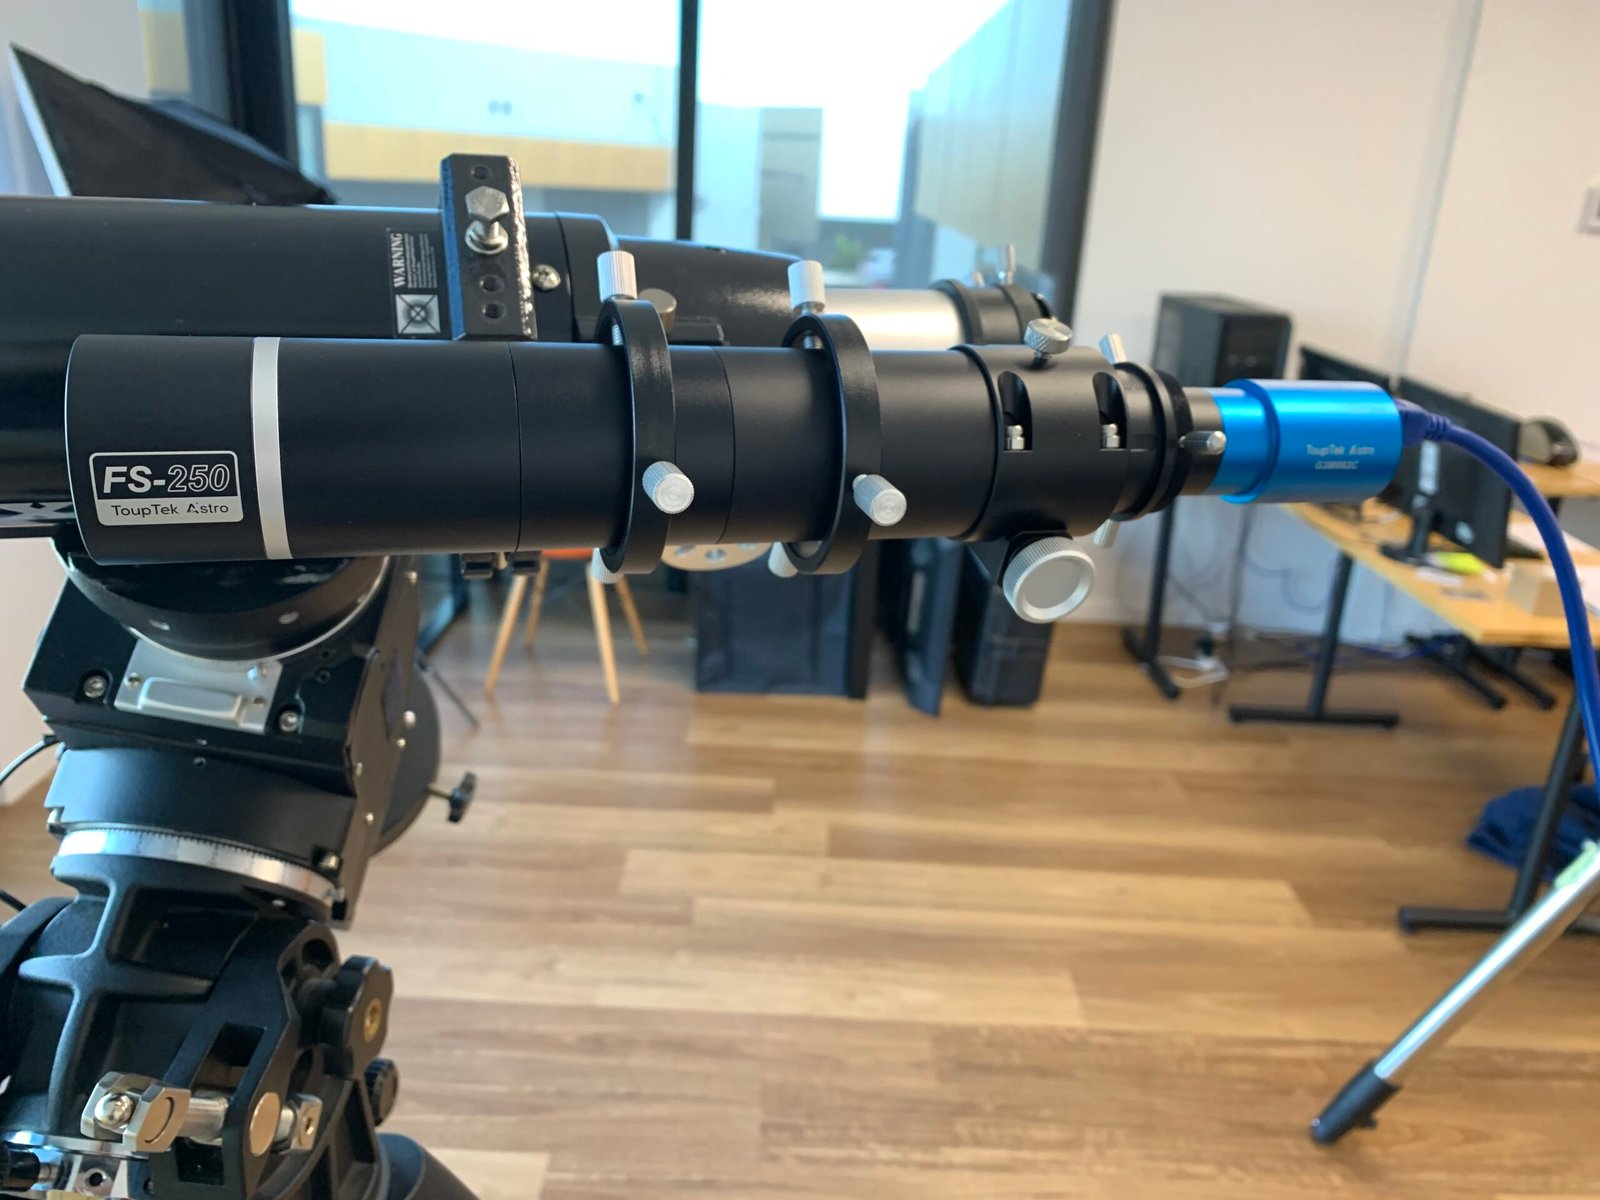
For this configuration we used the camera’s extension tube (most similar cameras come with them: this was a ToupTek camera). Even without it, we could have focused on infinity with the focuser racked out a little more.
Finally
The new GS series guidescope comes with non-adjustable tube rings. If you want to adjust the scope (and that’s important for finderscopes) you will need adjustable rings. For our test we used a set of our own finderscope rings. These ones are highly adjustable and have nylon-tipped screws. You can tighten the scope down securely without scratching or denting anything. These rings have a mini-Vixen shaped foot which will go where a normal finderscope does. It can also sit in the handle of a William Optics telescope.
So, the wrap up
We like these scopes. They’re inexpensive, work pretty well optically for the price, and they do lots of different jobs. Finderscope or guidescope – it doesn’t matter, you’ll be able to get it focused nicely. Your only remaining choice is which model.
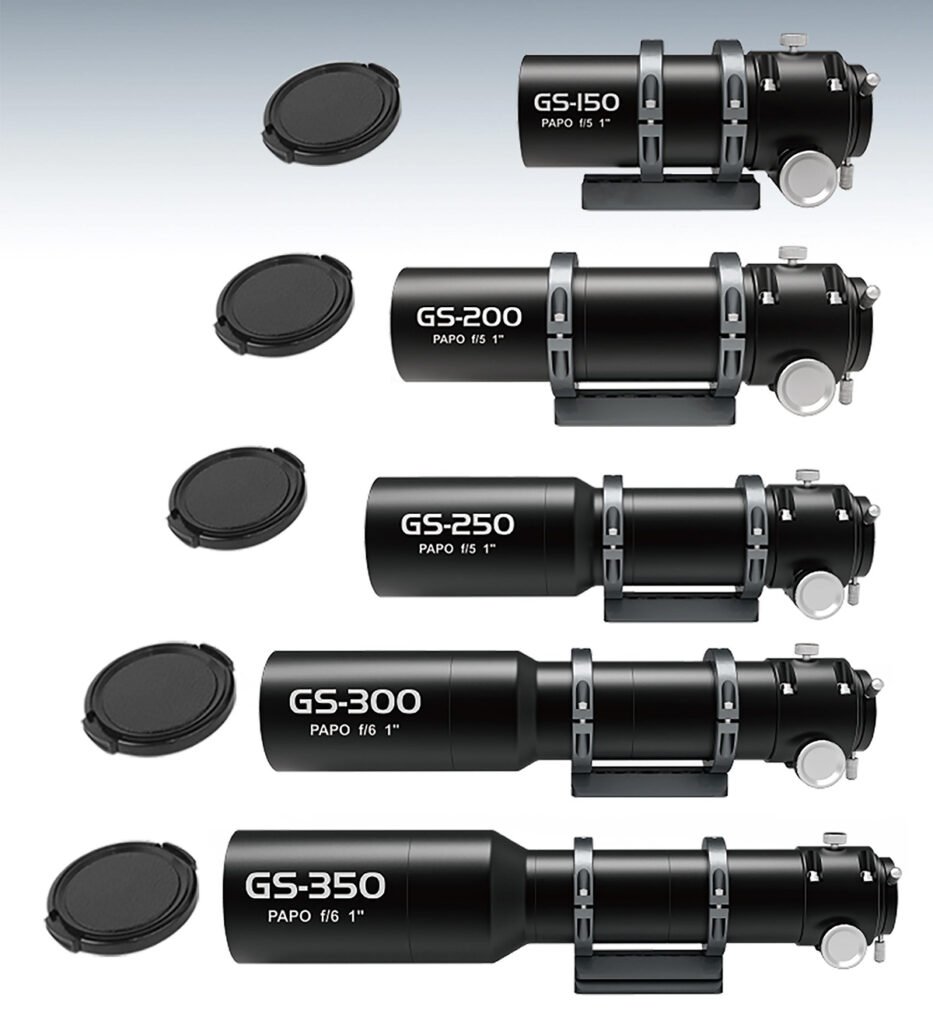
The GS series has yet to arrive in Australia, but we have the GS-150AR on the website now for pre-order. This one is a 30mm f/5 (with a 150mm focal length). If you want a different one, just let us know.
Other GS models are:
- GS-150AR and GS-150AC (30mm f/5)
- GS-200AR and GS-200AC (40mm f/5)
- GS-250AR and GS-250AC (50mm f/5)
- GS-300AR and GS-300AC (50mm f/6)
- GS-350AR and GS-350AC (58mm f/6)
Models with apertures of 50mm and above have flared tubes at the objective. This might mean you have to be wary of the wider opening if you intend to mount the scope on top of other gear.
The image circle of these scopes is small, meaning sensors larger than 1″ will tend to vignette. However, this means the scopes would be very appropriate for deep-sky imaging with sensors such as IMX183, IMX533 or IMX585. Check field of view simulators to see how your sensor will perform with different focal lengths.
Scopes are available with either a rack and pinion focuser (the AR models) or a Crayford-style focuser (the AC models). ToupTek says that the Crayford-style works best with autoguiding, and the rack and pinion would be better for heavier equipment. The one we tested was a rack and pinion and we found it very satisfactory. For autoguiding, we feel that the rack and pinion would be very capable and less prone to slipping. This is especially important for remote imaging or when you’re pointing straight up. However, both have a focus lock, so slipping would be unlikely.
Incidentally, the thread on the extension tubes is standard M48x0.75. This means that if you need a different length extension, they’re easily available.
The scopes all have ED glass, which will reduce chromatic aberration in colour sensors.
Note that ToupTek has discontinued the FS series in favour of the GS series. The new range has more focal lengths and a flatter focal plane.