The situation
We have a client who has a ZWO ASI2600MC-Pro, which is a colour camera with an APS-C sized sensor. He found that he was getting flexure in his guide scope and decided to switch to an OAG. At the same time, he decided to get a filter drawer, so he could swap between a plain UV-IR cut filter (when he images from a dark sky site) or a duoband filter (when he images from his home in light-polluted Melbourne. A filter drawer makes complete sense as it allows him to swap filters quickly and easily without having to have a cumbersome and only-partly-used filter wheel.
It’s a perfectly reasonable and (you’d think) common solution, right?
Get ready to go into the weeds!
The challenge(s)
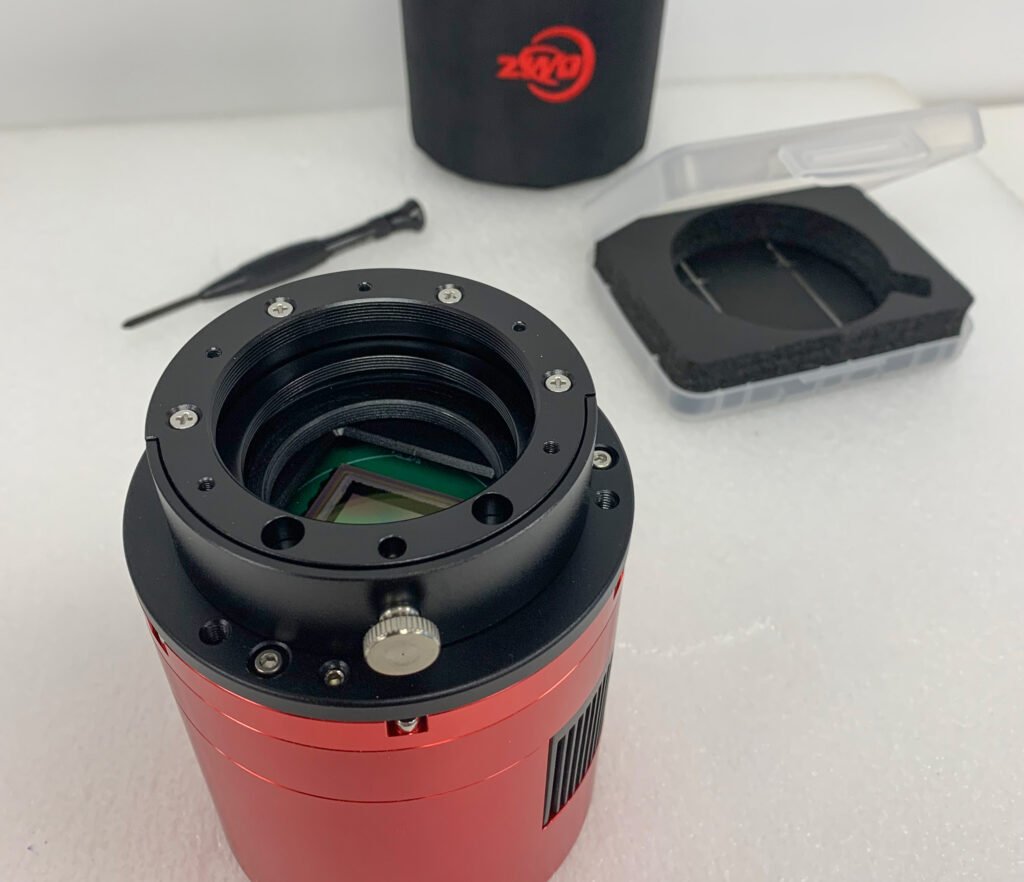
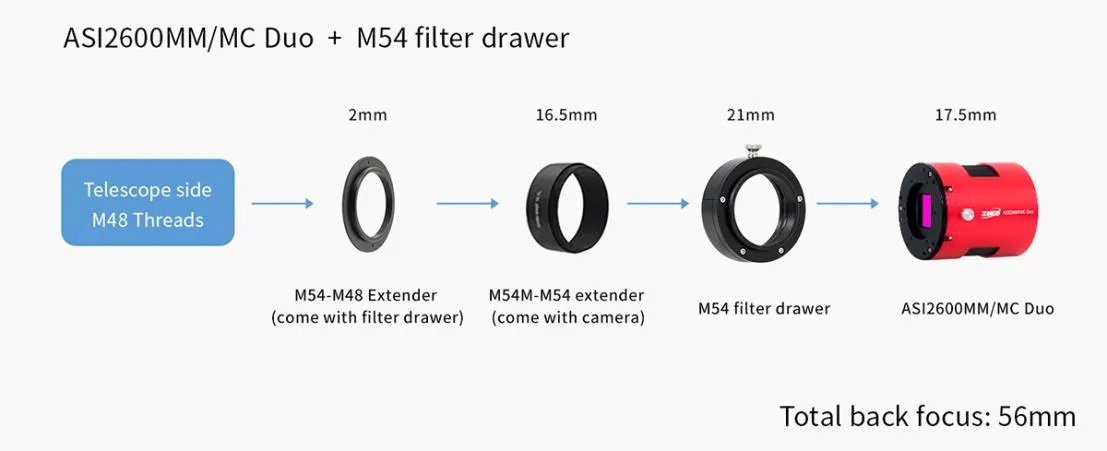
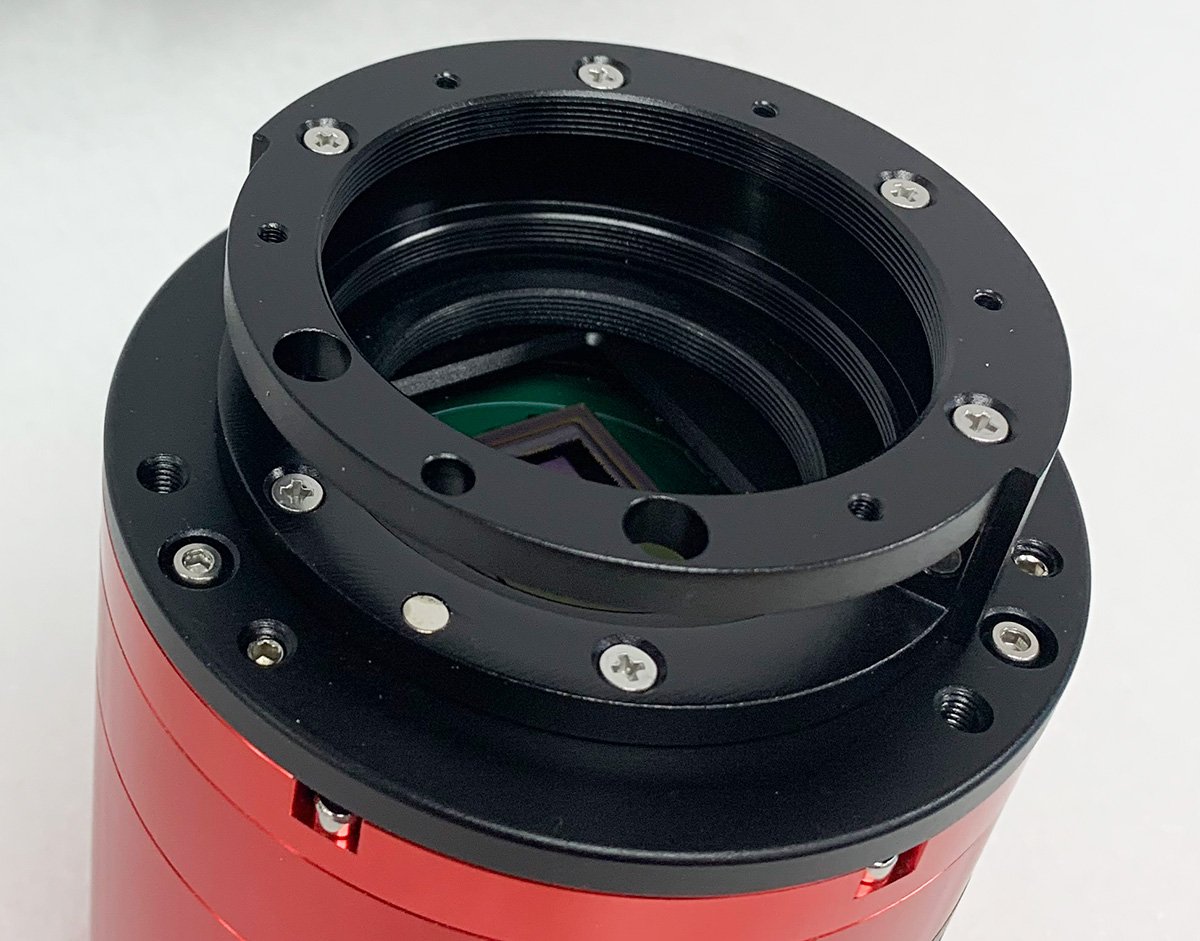
Our client got the ZWO OAG-L and the ZWO M54 filter drawer and found that putting them together was a challenge. The ZWO tutorials are many and varied, but none showed this exact setup, and ZWO didn’t give any guidance on its filter wheel page. The closest we could come was with an ASI2600MC-duo, which has an M54 tilt plate on the camera, as shown here. The ASI2600MC-P has a 42mm hole.
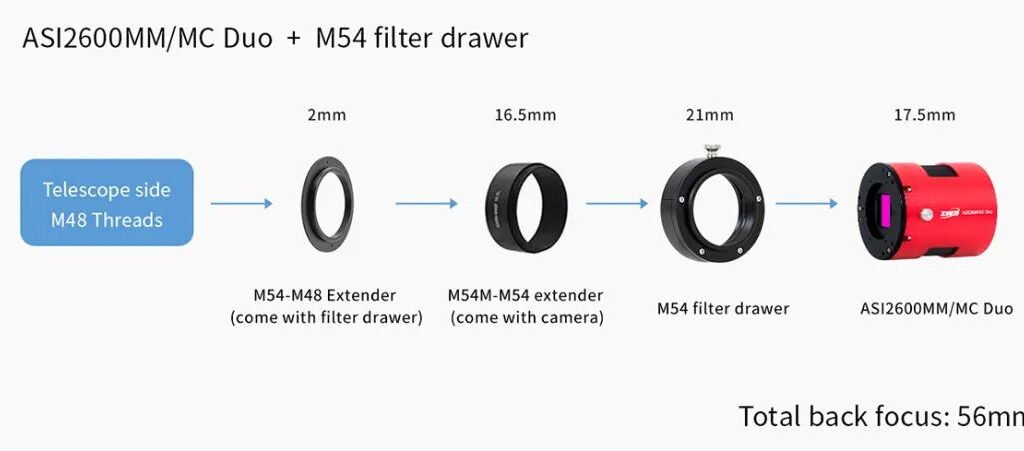
In the past, when installing filter drawers, the normal approach has been that the filter drawer exactly replaces the filter wheel. However, but with newer bolt-together trains, this doesn’t work.
Modern filter wheels bolt to the front of the camera using six M2.5 bolts. This is undoubtedly a better approach than simple threads, especially for off-axis guiders, because the thread ends at a random place and there’s no guarantee that the prism on the OAG will end up where you need it. What’s worse, the ZWO M54 filter drawer is pre-bolt, and instead has a very problematic male M54 thread sticking out on the camera end. There’s simply no way to attach an M54 filter drawer to the M42 tilt plate on a standard ASI2600MC-Pro.
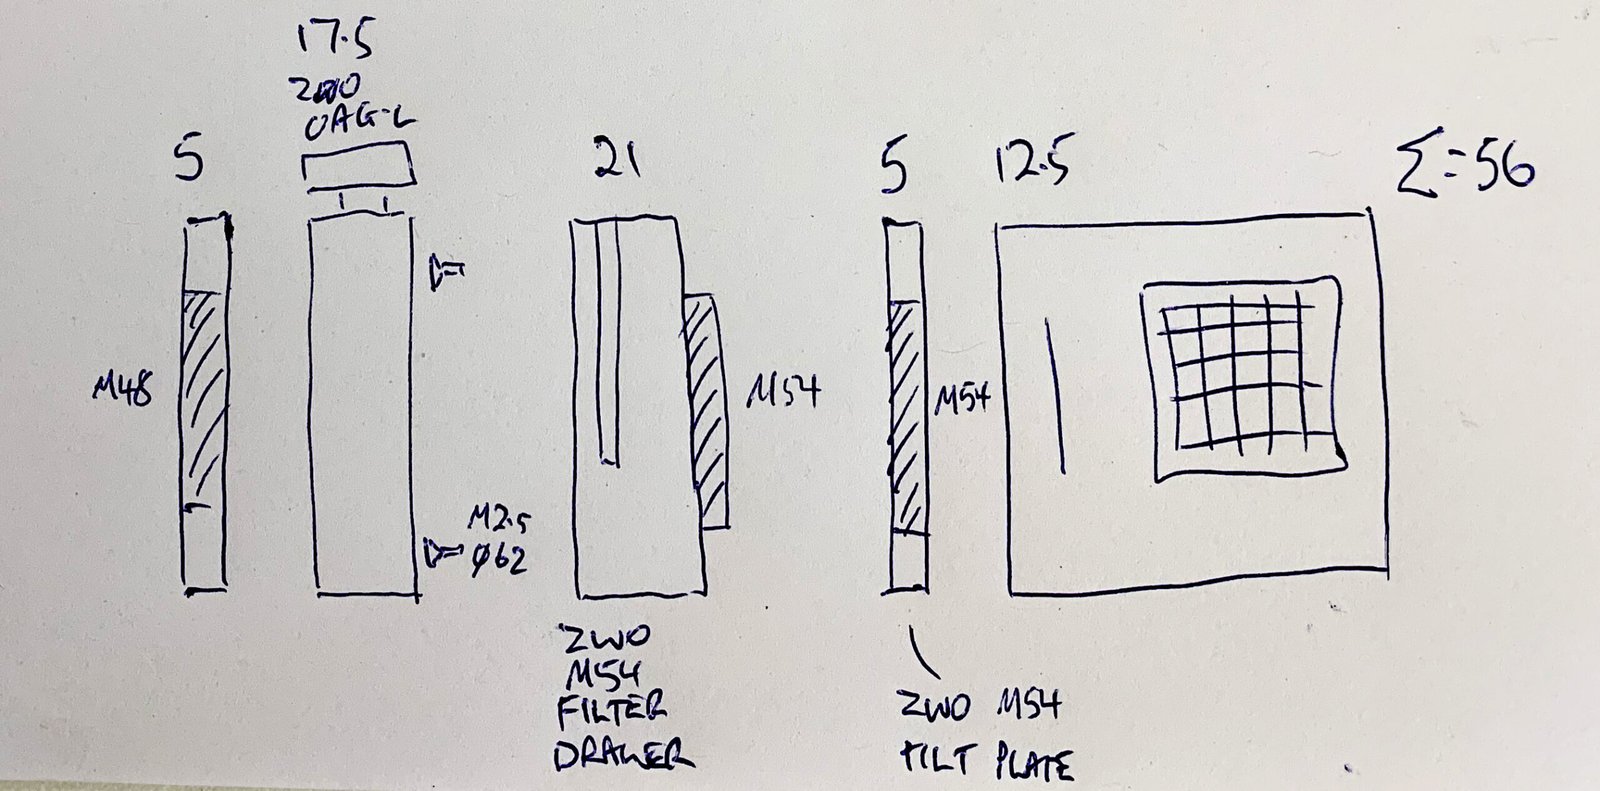
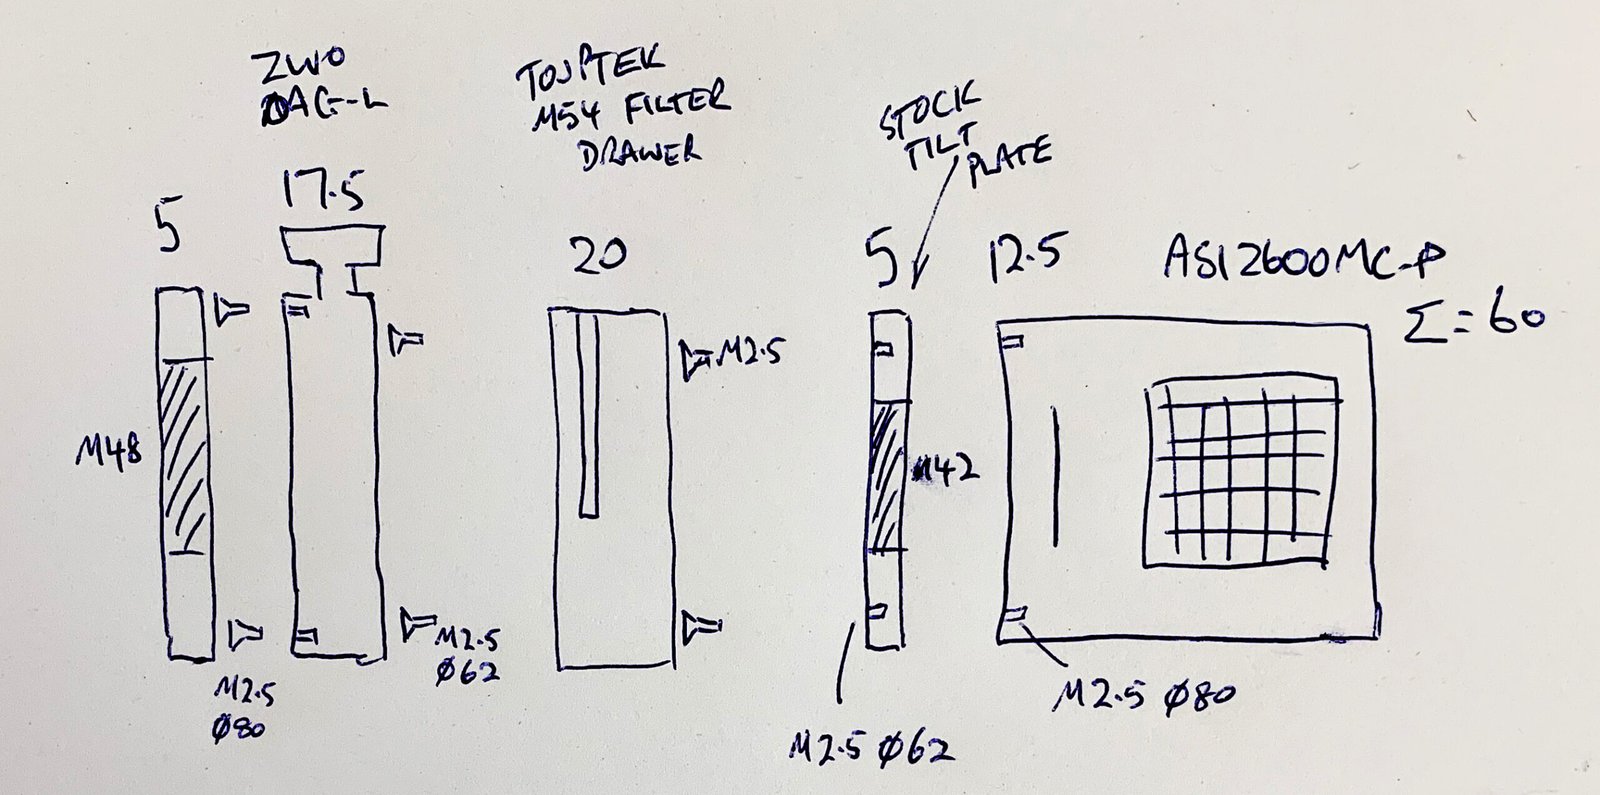
The ZWO solution to this is to replace the M42 tilt plate with an M54 tilt plate as shown in the scribbled diagram here.
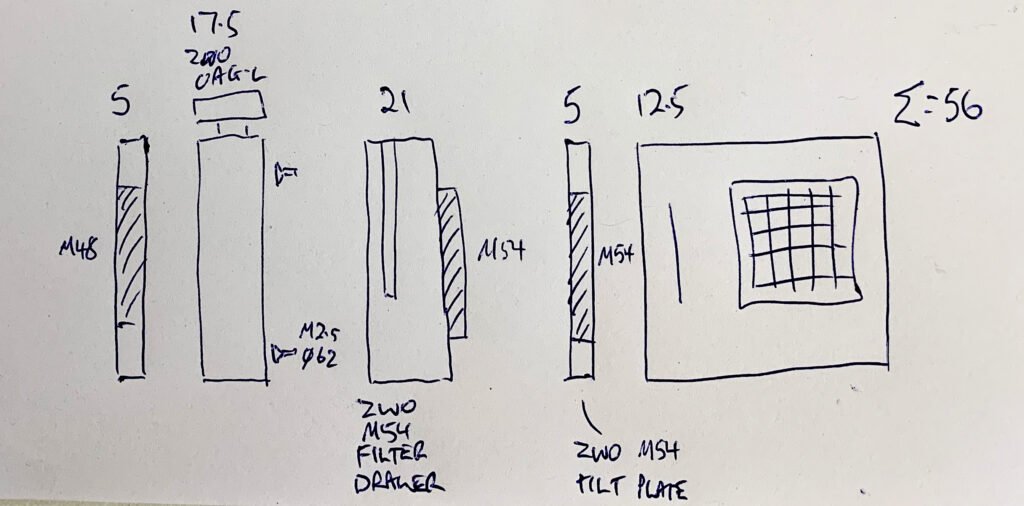
Sadly, this wasn’t an option because that M54 tilt plate wasn’t available. This was turning out to be a difficult exercise.
Using a different branded filter drawer
Instead, we used a ToupTek M54 filter drawer.
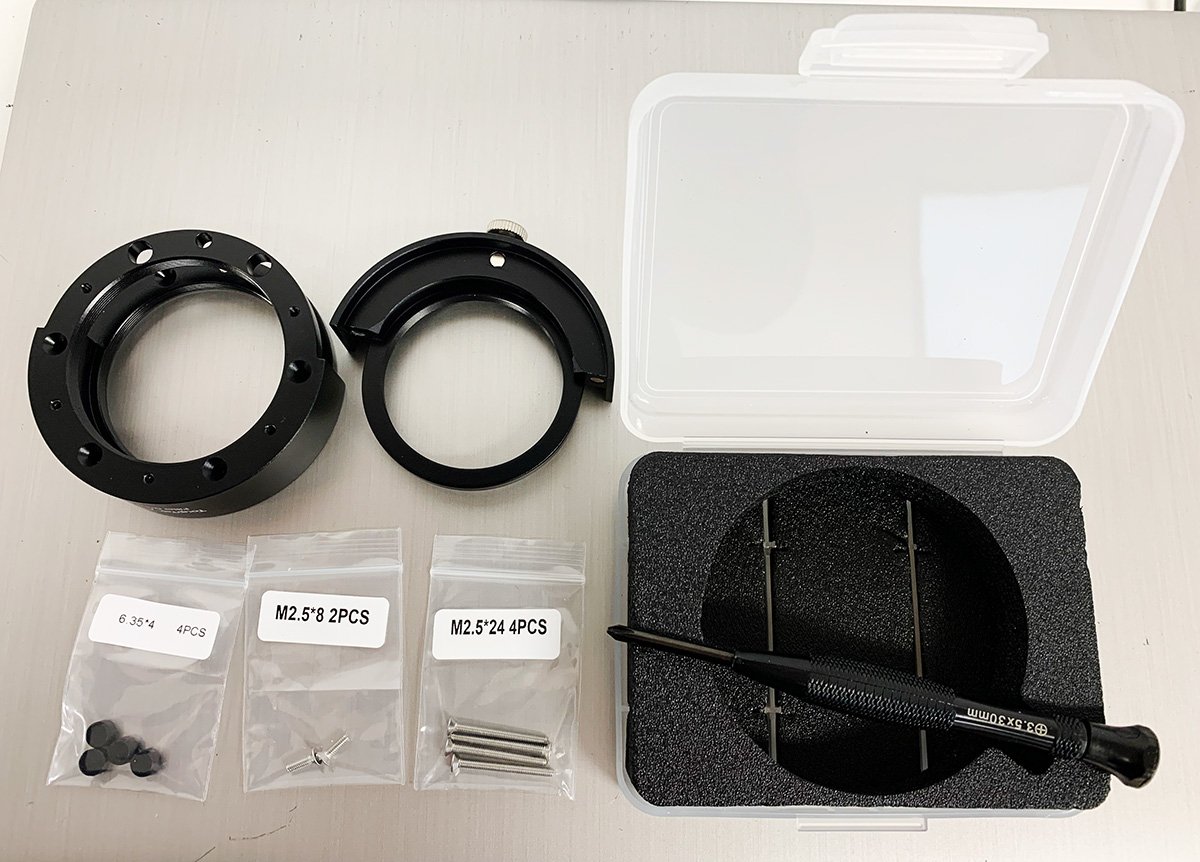
ToupTek has engineered their filter drawer to be ubiquitous, meaning it will fit as many other manufacturers as possible. The filter drawer has M54F threads on both sides, plus holes for M2.5 bolts. The filter drawer is nicely designed, and they have included some rubber plugs to block light leaks.
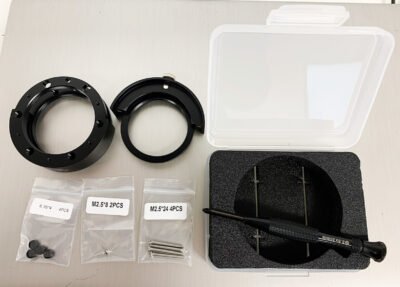
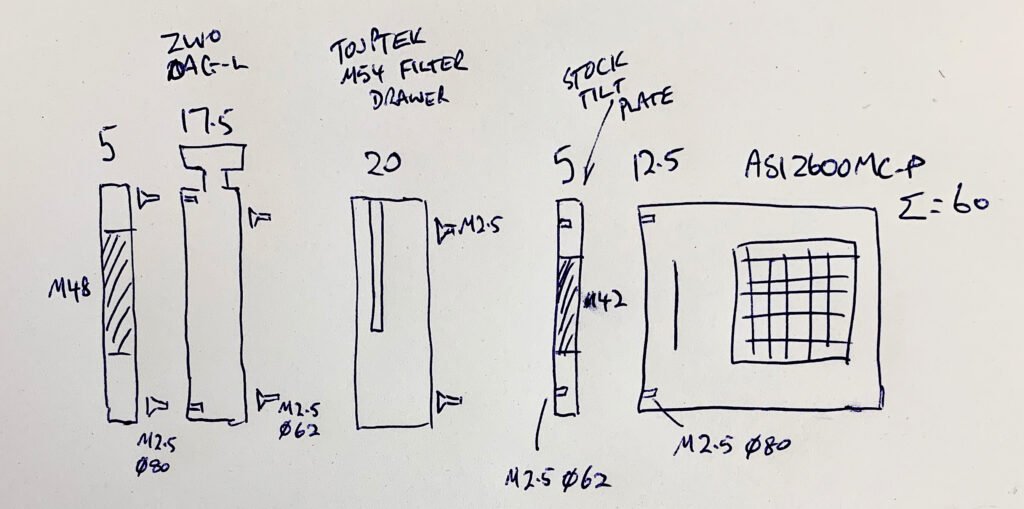
To attach the filter drawer to the ASI2600MC-Pro, four long bolts go through the whole filter drawer and into the existing camera tilt plate. This plate has the 42mm hole, but this won’t cause vignetting as it’s only an APS-C sensor.
There are two short bolts that go through the filter drawer’s frame, allowing you to remove the filter slider. They’re nicely countersunk making filter changes smooth. You can see the long and short bolts here.
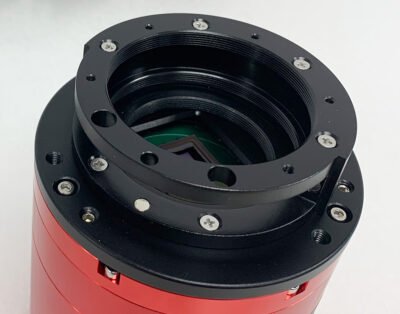
When you are attaching the filter drawer, make sure you orient the drawer (you have six possibilities), so the slider comes out without fouling any other component.
Switching back to ZWO
The scope side of the ToupTek filter drawer has five threaded M2.5 holes which allow you to attach a ZWO OAG-L, the large off-axis guider. It’s five, not six, as the last one would go through to very top, which is where the prism goes. This set of bolts is offset to the camera bolts by 30°, which matches the bolt pattern on off-axis guiders. Because of this, the prism on your OAG will always be set on the long side of your sensor, keeping it out of view.
Finally, the 48mm tilt plate from the scope side of the ZWO OAG-L stays where it is shipped. This allows the imaging train to be threaded onto the client’s refractor, which presents the normal M48 male.
Here’s another scribbled diagram of the whole mixed imaging train. You can see the ToupTek filter drawer sandwiched between the ZWO OAG-L on the left and the ASI2600MC-Pro on the right.
Back focus
To spoil things a little, we weren’t able to get to the magic 55 or 56mm back focus, having to make to do with 60mm. This was because the ASI2600MC-P doesn’t have the M2.5 bolt pattern on a 62mm diameter on the front of the camera. The bolts under the tilt plate are on a larger 80mm diameter to accommodate a filter wheel.
The client has a quadruplet refractor, which provides a flat focal plane, so this is not an issue here. It’ll also work on a long focal length system like a Schmidt-Cassegrain or a Maksutov. However, if you are trying to copy this optical train on a triplet refractor or Newtonian, it’s not going to give you good results.
So here we are…
My guess is that ZWO will soon come out with a filter drawer that is wider and bolts directly to the camera, rather than the tilt plate.
However, until that time, the client has an imaging train from more than one brand, and including a filter slider rather than a filter wheel. It’s bolted together, meaning the prism on the off-axis guider is set in the right place. The client can swap filters when he needs to, with a prism that’s perfectly placed.