Getting an image of a comet using the Benro Polaris

C/2023 A3 Tsuchinshan-ATLAS from Wyperfeld

I got a couple of images of a comet, and to do it, I used the Benro Polaris.

Shooting comets is famously difficult. The two challenges are the length of time you have available and the location you shoot from. Neither are easy.

I used my Pentax DSLR, and for this one, I chose a Benro Polaris tracking mount. This little gadget sits on my own tripod, is small and robust enough for me to carry it up and down hills at 4am, and it’s fast and easy to set up.

Once I’d climbed a bit of a learning curve, setup was quick and reliable. I even found time to spend marvelling at the sight before me rather than concentrating on the equipment.

The target

C/2023 A3 Tsuchinshan-ATLAS is a mouthful of a name, but it was a promising comet. We were well-placed in Australia to get a good angle on this one, and besides, I was looking for an excuse to get out of the telescope factory in Melbourne.

But once I got there, I wasn’t going to have much time for imaging. The comet rose at about 4:20 in the morning, but it was going to be around 15 minutes before I could see the coma through all that atmosphere and start imaging. At the other end of the session, the sun rose at 5:55, but my planetarium app was telling me that “nautical dawn” was at 4:55. It was clear that I’d be imaging in a brightening sky. Realistically, I figured I had an observing window of only about 25 minutes between 4:35 and 5:00. The pressure would be on.

To get a decent image, I was going to need planning, reliable but simple equipment, and a fast setup. I was also going to need a bit of luck: planning isn’t my forte.

The location

I normally use our local Astro Society’s fantastic dark sky site for my imaging. In this case, that wasn’t going to work. Comets are most photogenic when they’re close to the Sun, so they’re not going to look good more than a few degrees above the horizon. Mountains, buildings, or even bushes are going to get in the way. I needed to get a good clear view of the horizon, and the normal place had too many trees.

I chose Wyperfeld National Park in Victoria’s desert north-west. It’s not quite the “big sky” country you find in the wheat belt, but there are a few lookouts with excellent views. And it’s dark – close to as dark as you’ll get anywhere on the planet. Even from the campsite I’ve had clear views of stars on the horizon.

The equipment

Only a fool would image a comet with a monochrome camera (hi Dylan!) so I used my trusty DSLR – a Pentax K3-II. I was undecided about which lens to use, I considered a 220mm lens, but settled on an 85mm, as the tail of the comet was looking to be long. I really didn’t want just the front half of the comet, so I hedged my bets and threw in a 50mm as well. This turned out to be a good decision.

For a mount, I took a demo Benro Polaris from the shop. This is billed as a “smart electric tripod head”. The Polaris, in its basic form, is an alt-azimuth tripod with stepper motors, which allow you to point your camera remotely. You can do panoramas, time-lapses, focus stacking, and all sorts of cool things with this, but for astrophotography you need an extra bit.

This is called the Astro Kit, and it’s basically a third stepper motor. It’s set at about a 45° angle to the altitude motor. Together, the three stepper motors can track a target while simultaneously rotating the camera, meaning your stars stay as points rather than streaks. It’s very clever, and I admit I was scratching my head over how it worked. I needed to take this time-lapse of it tracking before I figured it all out.

Benro Polaris with Pentax
Benro Polaris tracking the pole

Like most things these days, you control the Polaris with your phone. It connects wirelessly, and all you have to do is calibrate and align it, and then you’ve pretty much got a go-to star tracker. If you have the right camera, the Polaris can control that too, right down to exposure, focusing, and a live view through the Benro app as well.

The Polaris doesn’t include an actual tripod, although Benro does sell these. Any tripod that has a standard 3/8″ threaded bolt and a flat surface will do a fine job. I use an elderly Manfrotto tripod, but a Sky-Watcher or iOptron tripod will do the job nicely. If you want to look cool, or perhaps save weight, you can even get a carbon-fibre job.

Preparation

I’d already had a night at home with the Polaris, and I’d got some tracked images with nice round stars. The one thing that I figured out very quickly is that the Polaris doesn’t come with a cable to connect to my Pentax. Even now, I’m not sure that the two can work together. There’s no real trouble though, I used my Pentax live view for alignment and focusing, and an intervalometer for gathering images. Perhaps at some future stage I’ll borrow a Canon DSLR and have another go.

If the Pentaxian can think down to the Canon’s level, that is…

I figured the workflow was this:

  • set up the tripod without the Polaris on it, and use a spirit level to get it level as possible. Having a level mount will improve the accuracy of slewing from one part of the sky to another.
  • attach the Polaris to the tripod, put on the astro kit and the camera, and connect the astro cable.
  • turn on the Polaris, connect to the phone and run the auto-level procedure. This will also help slewing accuracy. You should end up with the camera pointing at the horizon. Which direction isn’t important yet.
  • go to the Astro mode in the Polaris app and calibrate using your phone. After I figured out how to do this (see below) it’s very easy. Once you confirm this, it should give about the right azimuth and an altitude of close to zero.
  • align the camera to the sky. This is effectively a one-star alignment, which is all you need once the tripod is level. If it’s at night, you can focus the camera at the same time.
  • go to the target, enable tracking and fire at will.

The story of the expedition

I live in Melbourne, Australia, and I was going to Wyperfeld National Park, about a 6 hour drive away. The skies there are about as dark as anywhere on the planet. The closest settlements are Rainbow (about 35km to the south) and Hopetoun (about 32 km to the east).

Dry lake bed, Wyperfeld National Park

First attempt

The first morning was beautifully clear but very cold. I got up at about 3:30am and went to the location I’d scouted out. The comet was going to be absolutely on the eastern horizon so I needed a good clear view right to the ground. I’d found a place on the western end of a long dry lakebed, but when I approached I found it deep in a heavy ground fog. I raced back to my car and drove 6km to an observation tower, hoping not to meet any kangaroos, and that I hadn’t missed the comet.

Arriving, panting, at the top of the tower I set up, and appreciated that the process to do so was so quick. Unfortunately, my troubles weren’t over, and for reasons I didn’t understand at the time, the Polaris refused to track. I had to use it as a manual tripod mount, getting untracked images. The image was promising, though. The tail was enormous, so much so that I decided to swap my 85mm lens for the 50mm one instead.

Here’s a single image, as evidenced by the satellite trails. Have a close look at the stars. They’re drifting up and to the left, which is what they do in the southern hemisphere. There’s no tracking going on at all. You’ll also notice how close to dawn it was.

In the wash-up afterwards I discovered that the “extra” cable, that connects the Astro kit to the Polaris, had been unplugged. Rookie error. No wonder it wasn’t tracking.

Single image of Tsuchinshan-ATLAS from Eastern Lookout

Second attempt

The second night went much smoother. I’d decided to relocate to another lookout, at the top of a dune about a 15 minute walk from the campsite. I arrived about 4am, ready for the comet to rise at 4:20. Setup and initial calibration went fine, and I focused and aligned on Jupiter, using my Pentax’s live view. Slewing manually to where I expected the comet to be, I was ready well before my expected start time of 4:35. Once it was all visible, I framed the camera and started my 10 second images.

Benro Polaris at sunrise

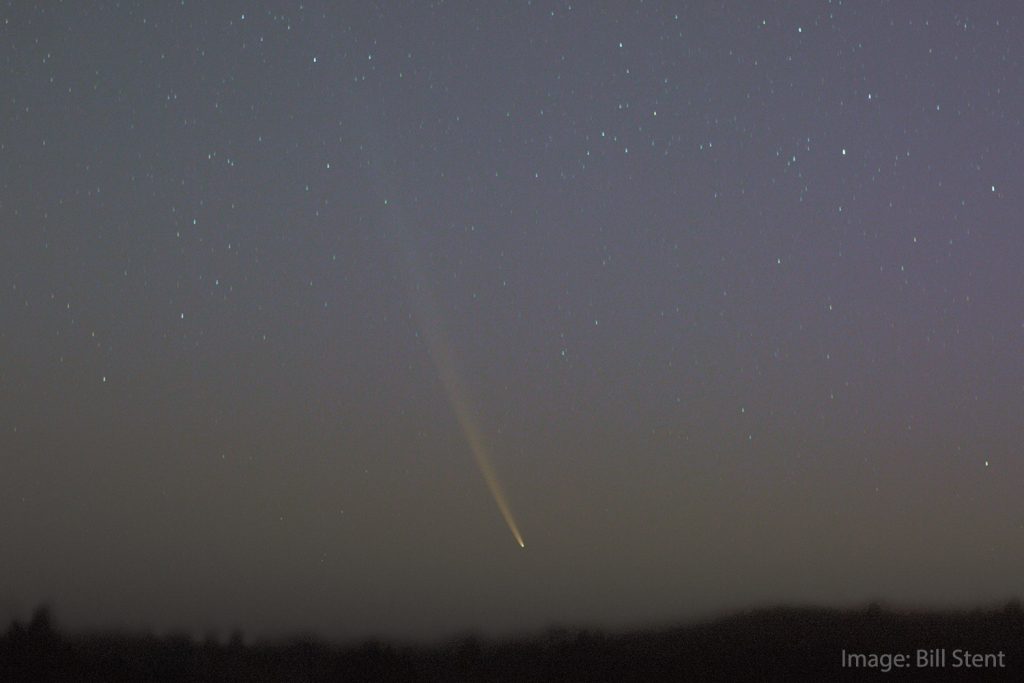
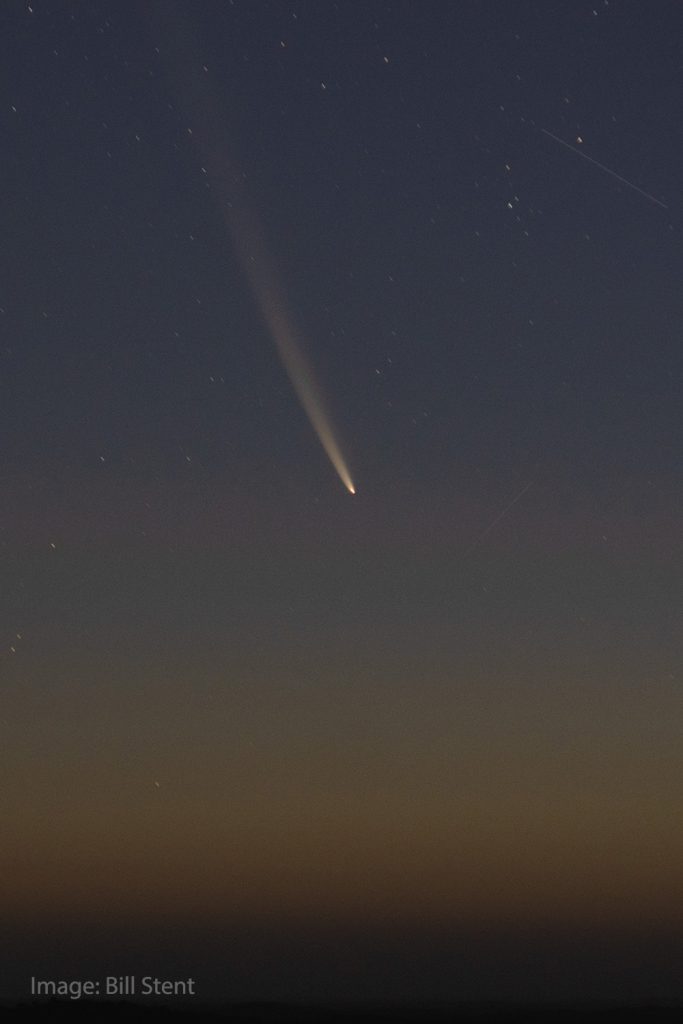
I was concerned with dew settling on my lens, but because the camera was nearly horizontal, it didn’t become a problem. The sky brightened faster than I expected, and I eventually got about 10 minutes worth of exposures. Looking at the back of the camera, I wasn’t optimistic, but I got 45 images, and eventually made a stack of 40, rejecting 5 (there are a LOT of satellites around at that time of day). You can see the image at the top of the page.

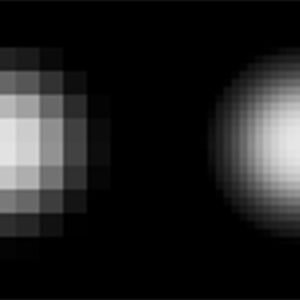
Have a close look at the stars in the final image. They’re drifting, but not up and to the left, just up. That’s because I’ve stacked the exposures on the comet, rather than the stars. Comets move remarkably fast, and this is what it did in the 10 minutes I was exposing for.

You’ll also notice that I really did need that 50mm lens. The tail is simply enormous!

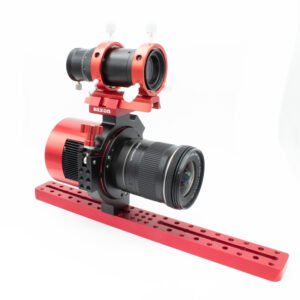
The Benro Polaris – what I learned

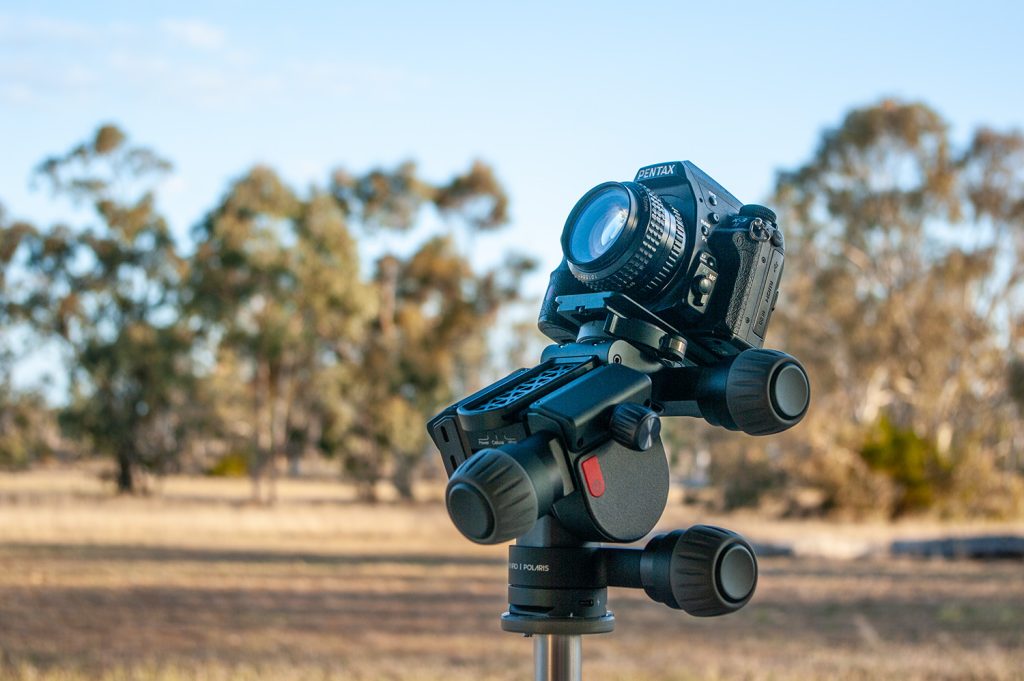
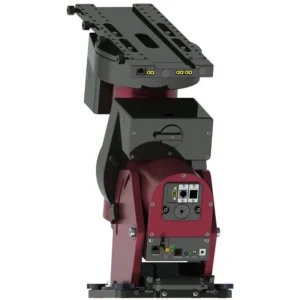
This is a bit of kit I think I could fall in love with. The Benro Polaris is a completely new type of tracker. If I was forced to describe it, I’d say it’s a go-to alt-azimuth mount with a built-in derotator. Its big advantage – and it is a huge advantage – is that you don’t need to polar align.

Traditional trackers like the iOptron Sky Tracker, Vixen Polarie or Sky-Watcher Star Adventurer have to have one axis pointed very accurately at the Celestial Pole. In the Northern Hemisphere, this isn’t too much of a trial because there’s a bright star close by. Here in the South, though, this is a time-consuming and fiddly process. In light-polluted areas, it’s nearly impossible and utterly impractical

The Benro Polaris gets around this problem completely. It doesn’t need to be polar aligned. Because it’s essentially an alt-az tracker, all it needs to know is that it’s level, and the direction it’s pointing at the start. The computer and stepper motors – particularly that third one – take care of the rest.
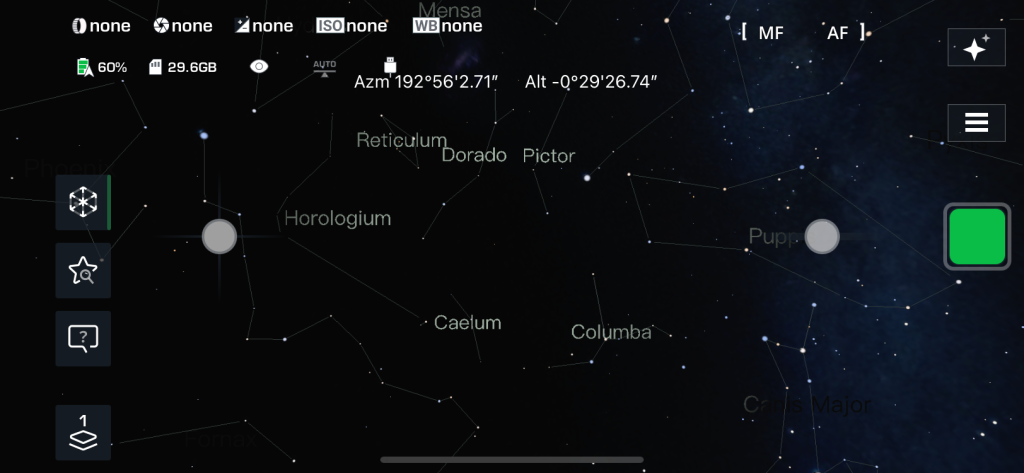
The phone app

The phone app that comes with the Polaris is different to apps I’ve used before. I suspect it was created by a photographer who isn’t primarily an astrophotographer. Nothing wrong with that, of course. It just took a bit of getting used to.

I found that I had to disable mobile data on my phone in order for the app to work. I’ve no real understanding of why this should be. Because of this, it’s never notified me of a firmware update – I don’t think there’s any way of this information getting through. That hasn’t been a problem yet.

Recently, the Polaris app has been updated to a new one called “Polaris Connect”. Once you get past the first screen or two, it’s very similar. The added functionality is mostly for other Benro products.

Things to watch out for

Together, the Polaris and your camera weigh a couple of kilos, depending on your lens. As it’s a movable head, your camera and lens could find themselves on one side of the stance of the tripod. The risk here is that a heavy camera might actually overbalance a tripod with a narrow base and fall to the ground. If you can widen your tripod’s legs, I’d definitely recommend it.

I found it hard to pick up the Polaris without inadvertently touching the on-off button. More than once I had it turn on (or more often, off) in my hand. If it’s off, but in its folded-out position, picking it up can trigger it to come alive and fold itself up, which is surprising and disconcerting.

The little clamp that secures the camera to the Astro kit takes a bit of getting used to, and seems to jam. I nearly had the camera fall off at one point, as I thought it was fully tightened. I’ve learned to close the clamp first, give it a wiggle, then tighten the knob.

To “fold” the Polaris, you have to turn it off, then press and hold the on-off button. However, it’s best to remove it from the tripod head before you do. If your tripod head is at all wide, the altitude wheel can run into the tripod head.

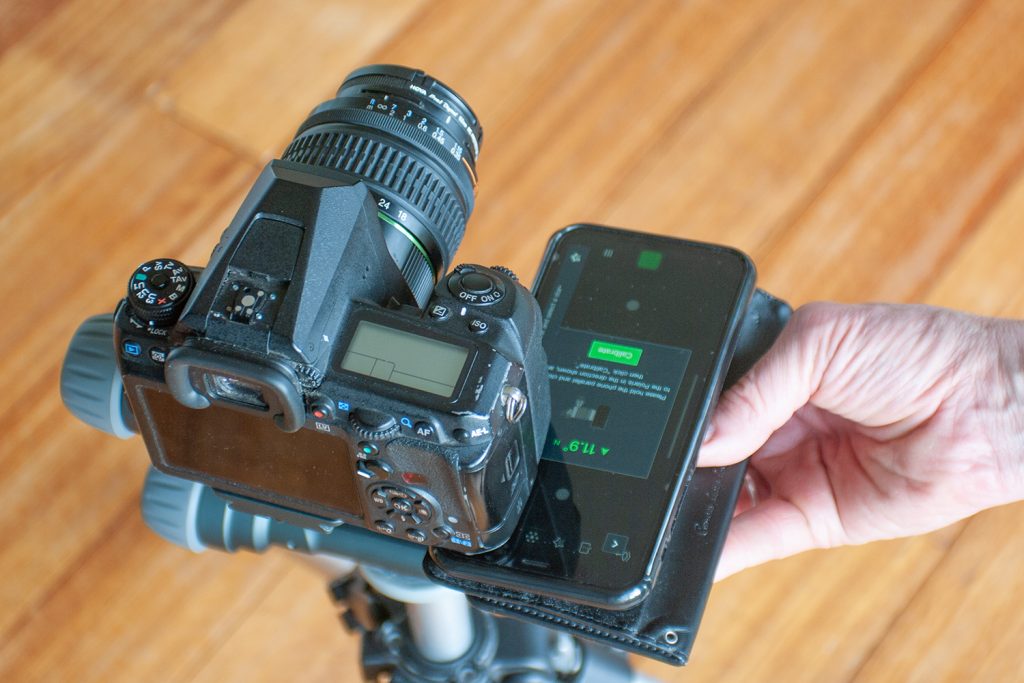
Calibration is just plain weird. You have to hold your phone the wrong way around, so the azimuth displayed on the app reads the opposite to the azimuth your camera is pointed at.

You can see this in my photo – the camera was pointing roughly south, but the azimuth in the phone screen says it’s 12° – roughly north. But once I confirmed this, the eventual reported azimuth (in the screenshot) ended up at 192° – about right.

Calibrating the Benro Polaris

Very often, if I’m aligning during the day, I’ll use the Sun as my alignment star. The app always tells me that the sun isn’t currently visible, and slewing to it will go beyond the Polaris’ limits. If I ignore this and push on, the Polaris slews to about the right part of the sky.

So the overall opinion?

I’m often a bit sceptical of new gadgets in astronomy, but I think this one has some real potential. It certainly excelled on the specific things I needed – it’s simple and fast to set up and it’s light, robust and portable. I’m looking forward to using it in future.


The Benro Polaris is available from Sidereal Trading

Subscribe to our Monthly Newsletters and Tutorials

Recent Articles

What’s the time on the Moon?

How do we tell the time on the Moon? This will be an important issue once humans establish a long-term presence there. We list a few of the problems with time, and how they’ll probably agree on a single Coordinated Lunar Time.

An image of the Lunar X

The Lunar X is a pattern of light cast by the rising Sun over a complex group of walls near the Werner crater. It’s only visible for about 45 minutes each lunar cycle and it’s only visible a couple of times each year to people on Earth. We knew of an apparition coming up, so we used a remote dome to get an image. We did have to battle our share of clouds, of course.

About that Nova in Corona Borealis…

T Corona Borealis is expected explode in a cosmic event called a nova in the near future. However, it hasn’t happened yet. Now the sun is approaching and is threatening to drown out the star before it goes off. We might have to wait until January to see what happens.